|
|
| Overview |
The SolidWorks Adapter can be used to generate BOMs from any SolidWorks assembly.
The Adapter reads the assembly directly from the SolidWorks application.
Each user will need a valid SolidWorks license and have the application loaded on the same machine that is running CADKit.
To open the SolidWorks Adapter, select the Adapter from the CADKit Home Page or from the View menu.


When the SolidWorks adapter is launched, it will connect to a running instance of SolidWorks.
If SolidWorks is not already running, CADKit will launch SolidWorks.
|
 |
Opening Assemblies |
Top |
|
When the Adapter is launched, it will read and load the currently open assembly.
You can open an assembly in either CADKit or in SolidWorks.
To open an assembly from CADKit, click the Open Assembly toolbar button.

The assembly will be opened in SolidWorks and CADKit will begin the assembly load process.
|
 |
Loading Assemblies |
Top |
|
You can load an assembly by opening it from CADKit or by loading the currently open assembly.
To load/re-load the currently open assembly, click the Reload button from the toolbar.

When loading the assembly, CADKit will read the currently active configuration in SolidWorks.

Refer to the Configurations section for more information on SolidWorks configurations.
When loading an assembly, CADKit will attempt to load the following key fields from each model in the assembly.

| Level |
Automatically determined based on assembly hierarchy |
| Qty |
Automatically determined based on occurrences/instances |
| Part Number |
Determined based on model file name or model property (refer to the Preferences section for more information. |
| Name |
Read from Model file name |
| Rev |
Can be read from Model property value |
| Description |
Can be read from Model property value |
CADKit can also read custom properties.
Refer to the BOM Form section for more information on custom fields.
When loading the assembly, CADKit will read fields based on settings in the Options dialog box.
To modify how CADKit determines field values from models, select the Options command from the Tools menu.

Select the SolidWorks Fields option.
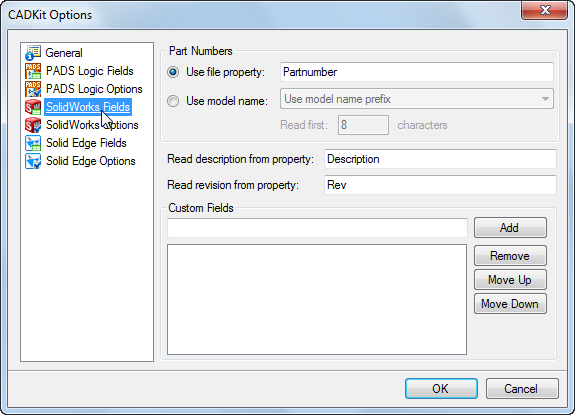
You can have CADKit determine the model Part Number either from the model file name or by a custom model property.
To use the model file name as the Part Number select the Use model name option.

You can then determine if the system should use the entire file name, the first x number of characters, or read until a specific character.

If you want to have CADKit use a model property as the Part Number, click the Use file property option and then specify the property name that contains the part number for each model.

To enable CADKit to read model Descriptions and Rev fields, specify the property name that contains the field values for each model.
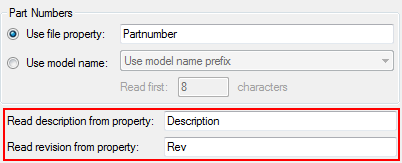
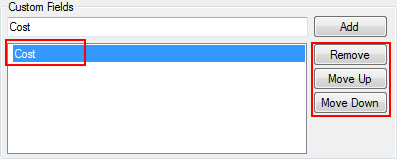
You can load/display additional data fields, by specifying the custom file/model properties in the Custom Fields.
To add a custom field, type the model property name and click the Add button.

You can remove or adjust the order of the fields by selecting the field and using the Remove, Move Up, and Move Down buttons.
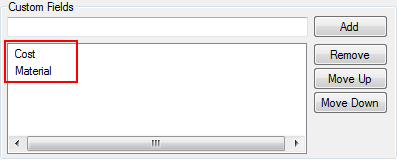
All custom fields will appear in the Assembly list.

CADKit can ignore loading items from SolidWorks assemblies based on various options.
To ignore items select the SolidWorks Options page of the Options dialog box.
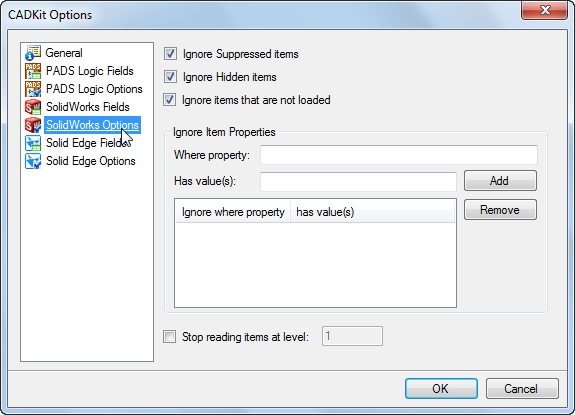
The SolidWorks Options page contains the following options/settings:
| Ignore suppressed items |
If enabled, CADKit will ignore "suppressed" items in the assembly |
| Ignore hidden items |
If enabled, CADKit will ignore items tagged as "hidden" (new versions of SolidWorks) |
| Ignore items that are not loaded |
If enabled, CADKit will ignore design components that have not been loaded in the current configuration |
| Ignore Items Properties |
This section allows you to define multiple model parameter names and values. If the components have the custom properties defined in this list, they will be ignored when loading. |
| Stop reading items at level |
Allows you to ignore loading items under a specified level of hierarchy. |
|
 |
Configurations |
Top |
|
When loading the assembly, CADKit will read the currently active configuration in SolidWorks.

All configurations will be listed in the Configuration drop list.

You can change the Configuration by selecting it from the drop list.
|
 |
Verifying Items |
Top |
|
CADKit contains a model verifier as part of the BOM form.
The verifier will load components from the assembly to the BOM Form window and then search the Omnify database to find matching part numbers.
To launch the Verifier, click the Verify button from the Adapter toolbar.
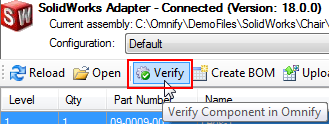
The verifier will read all models from the assembly and create a BOM form window.
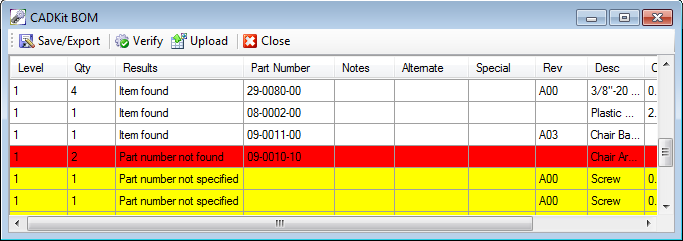
The Verifier will search for each part number in the Omnify database and, if found, compare the current revisions of the model and the revision in Omnify.
The Results field will indicate one of the following:
| Part number not found |
Part number was not found in the Omnify database |
| Part number not specified |
Part number was not obtained from the model |
| Revision difference |
Part number was found in the Omnify database; however there is a Rev difference between the item in Omnify and the model file. |
| Item Found |
Part Number was found and the Revisions match between Omnify and the model file. |
|
 |
Creating BOMs |
Top |
|
To create a BOM from a SolidWorks assembly, click the Create BOM button from the Adapter toolbar.
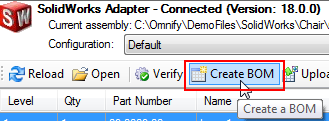
This will read all models in the current assembly and create a BOM window listing all components.
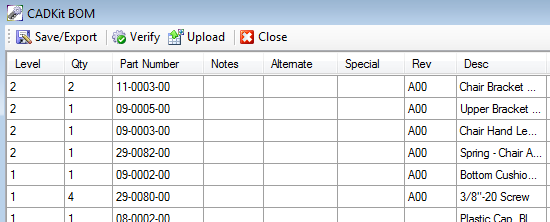
When loading the BOM, the system will determine the Part Number for each model based
on the SolidWorks Field settings (Preferences dialog box).
Refer to the Loading Assemblies section for more information on identifying Part Numbers from assembly models.
Once the BOM is created, you can save the BOM to various formats as well as Upload the BOM to Omnify.
Refer to the BOM Form section for more information on BOM functions.
|
 |
Uploading to Omnify |
Top |
|
To upload a BOM from a SolidWorks assembly to the Omnify database, click the Upload button from the Adapter toolbar.

This will read all models in the current assembly and create a BOM window listing all components.

The BOM window will then invoke the Omnify Upload Wizard.
Refer to the BOM Form section for more information on uploading to the Omnify database.
|
|