|
|
| Overview |
|
The various CADKit Adapters will provide BOM creation, item verification, and upload (to Omnify) functionality.
Each adapter will pass the appropriate data to the BOM form, which performs these functions.
|
 |
Creating BOMs |
Top |
|
To create a BOM from the Adapters, click the Create BOM button from the Adapter toolbar.
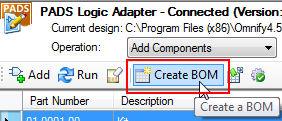
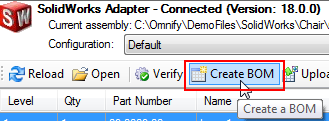
This will read all data from the source Adapter and create a BOM Form window listing all items.
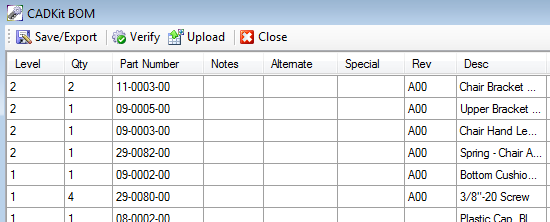
The fields will differ based on the source Adapter.
|
 |
Custom Fields |
Top |
|
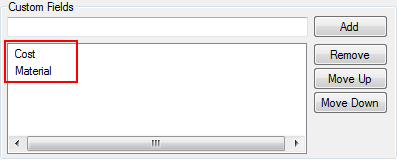
Each adapter has the ability to pass "Custom" fields to the BOM window.
"Custom" fields are additional attributes/properties that are read from the source design
(schematic or assembly) and included when the user launches the BOM form from any adapter.
To set/modify custom fields, select the Options command from the Tools menu.

To set custom fields for a particular adapter, select the "Fields" page for the specific adapter.

For PADS Logic, fields identified as "Load" fields will appear as custom fields in the BOM form.


For SolidWorks and Solid Edge, fields identified as "Custom" fields will appear as custom fields in the BOM form.

|
 |
BOM Form Basics |
Top |
|
The BOM Form contains a BOM Toolbar and Items List section.

The BOM Form toolbar contains the following commands:
 |
Save/Export the BOM to OmniBOM, Text, CSV, or HTML Formats. |
 |
Search the Omnify database to find each item on the BOM. |
 |
Upload the BOM (and files) to Omnify |
 |
Close the BOM Form window. |
|
 |
Saving/Exporting BOMs |
Top |
|
You can save the BOM to the following formats:
| • | OmniBOM |
| • | Omnify XML |
| • | Microsoft Excel |
| • | CSV |
| • | Text |
To save the BOM, click the Save/Export toolbar button.

When saving the BOM, change the Save as type option for the desired output format.

|
 |
Verifying Items |
Top |
|
The BOM Form contains an item Verifier.
The verifier will load items from the source adapter and then search the Omnify database to find matching part numbers.
To launch the Verifier, you can click the Verify button from the Adapter toolbar or select the Verify button from the BOM Form toolbar.

The Verifier will search for each part number in the Omnify database.
If the BOM was created from the SolidWorks Adapter it will also compare the current revisions of the model and the revision in Omnify.
The Results column will display the results of the verification.
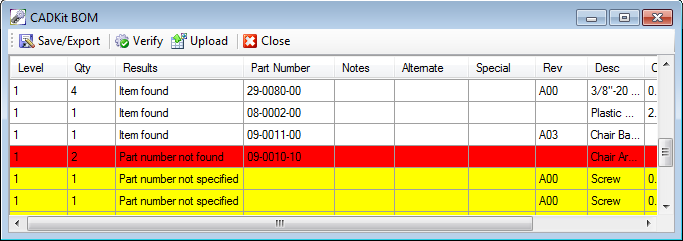
The Results field will indicate one of the following:
| Part number not found |
Part number was not found in the Omnify database |
| Part number not specified |
Part number was not obtained from the model |
| Revision mismatch |
Part number was found in the Omnify database; however there is a Rev difference between the item in Omnify and the model file. |
| Item Found |
Part Number was found and the Revisions match between Omnify and the model file. |
|
 |
Upload to Omnify |
Top |
|
The BOM Import Wizard of Omnify Desktop can read the native OmniBOM (.obx) files.
To upload a BOM to Desktop, you can simply save the BOM to an OmniBOM file and then import it once you are in Desktop.
CADKit also provides a direct upload method that eliminates the need to save the BOM as an external file.
The Omnify database provides a "BOM Data Set" management facility.
BOM Data Sets are data objects stored in the Omnify database that can be used when importing BOMs using the Omnify Desktop BOM Import Wizard.
BOM Data Sets provide a manner that BOM data can be stored in the system without the need to manage individual BOM files when importing BOMs into Desktop from other sources.
When uploading a BOM to the Omnify database, CADKit will create a BOM Data Set that can then be used by the BOM Import Wizard in Desktop.
To upload a BOM to Omnify, click the Upload button from the Adapter toolbar after the assembly has been loaded in CADKit or click the Upload button from the BOM Form.
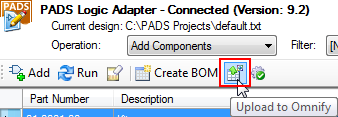


This will invoke the Upload to Omnify Wizard.
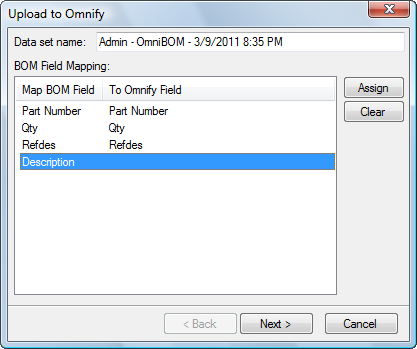
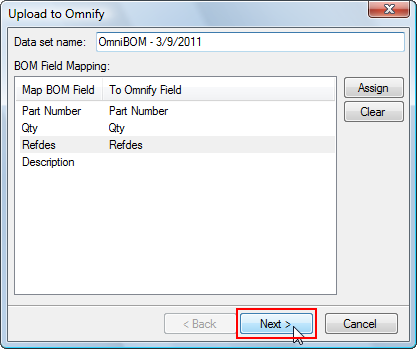
On the first page of the Upload to Omnify Wizard you will map the current BOM field to Omnify BOM fields.
CADKit will attempt to automatically map the fields upon initialization.
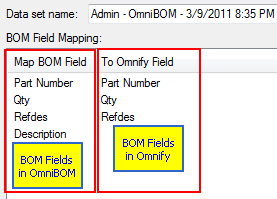
To map a field, first select the field and then click the Assign button.

From the Map BOM Field dialog box, you can select the BOM field that you wish to map the CADKit field to.
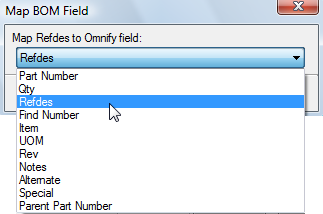
To clear a mapped field, first select the field and then click the Clear button.

You will also need to specify a Data Set name.
This name will be displayed in the BOM Import Wizard (Omnify Desktop) when importing into Desktop.
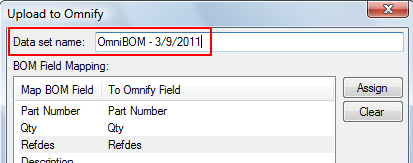
Once the Data set name is provided and the fields have been mapped, click the Next > button to advance to the next page of the wizard.
The last page of the Upload to Omnify Wizard allows you to select how the data will be assigned in Omnify.
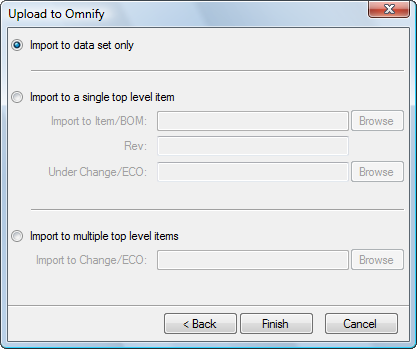
You will have 3 options:
| Import to data set only |
Imports the CADKit data directly to a data set. You can then decide how/when the data is assigned in Omnify. |
| Import to single top level item |
Imports the CADKit data directly to the Omnify BOM item/part number specified.
You can also have this import create changes/redlines to the BOM and assign them to a specific Change/ECO.
|
| Import to multiple top level items |
This option will only be available when a "Part Number" column is mapped to a CADKit field (on the first page of the Wizard).
Selecting this option will assign all parent BOM items as affected items to the specified Change/ECO.
|
Select this option if the Parent item or Change/ECO has not been created, or you would just like to import the data at a different time.
The Data Set created by CADKit will be available in the BOM Import Wizard (Omnify Desktop).

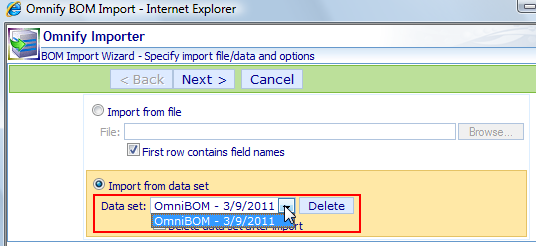
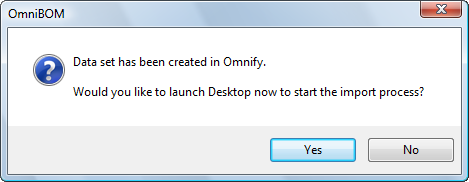
If you select this option, CADKit will ask you if you would like to launch Desktop after the Data Set has been created.
Selecting this option allows you to select the BOM/parent item that the BOM will be assigned to.
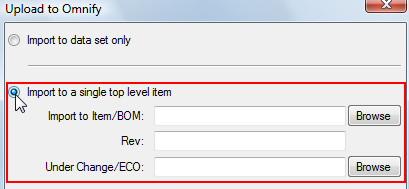
You will need to specify the item part number.
You can click the Browse to search the database for the part number.


You can optionally specify a Change/ECO that the import will be applied to.
When the data is imported, the system will automatically determine what changes will be made to the BOM.
If a Change/ECO is specified, the system will apply these changes as redlines under the specified Change/ECO.
This option will only be available when a "Part Number" column is mapped to a CADKit field (on the first page of the Wizard).
Selecting this option allows you to specify a Change/ECO that all BOM changes and parent items will be assigned to.
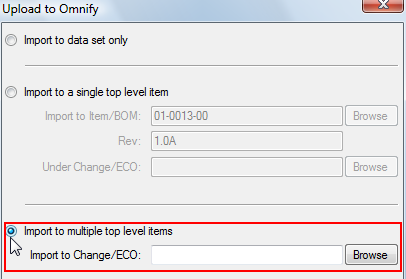
If this option is selected, you must specify an existing Change/ECO.

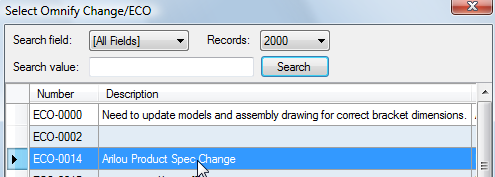

If this option is selected, the system will read all top level BOM items (specified in the mapped "Parent Part Number" column) and assign those items as affected items to the Change/ECO.
The system will then assign any BOM changes as redlines to the affected items automatically.
Refer to the Omnify Desktop BOM Import Wizard section of the Omnify Desktop User's Guide for more information on importing BOMs.
|
|