|
|
| Overview |
Using the Omnify ViewManager, you can create views for the following Omnify objects:
| • | Items/Parts/BOMs |
| • | Changes/ECOs |
| • | Projects |
| • | CARs/PARs |
| • | Vendor Items |
When creating views you can create a single view or create multiple Item views based on field values.
|
 |
Creating a View |
Top |
|
To create a single view, navigate to the ViewManager Home Page.
Note: you must be logged in as a user who has full view editing permission to create database views.

In the View Creation area, select the type of object you wish to generate a view for:

Next, specify a name for the view.
Note: it is recommended that you prefix the view (such as "view_") to easily identify the views from tables when using 3rd party applications.
Then click the Create View button.

If the view was created successfully, you will automatically be directed to the Modify View page.

|
 |
Creating Multiple Views |
Top |
|
The ViewManager allows you to create multiple Item data views automatically based on field values.
To create multiple views, navigate to the ViewManager Home Page.
Note: you must be logged in as a user who has full view editing permission to create database views.

From the Action Links section, select the Create Multiple Views link.

The Create Multiple Database Views page allows you to define the field and values as well as select which fields to include in the views.

When creating multiple views, you can base the views on Item Type, Category, or Attribute field values.

| Type |
A separate view will be created for each Item Type value used by items. |
| Category |
A separate view will be created for each Item Category value used by items. |
| Attribute |
A separate view will be created for each value of the selected Attribute field. |
When creating views based on an attribute, you will also need to select the attribute field:

You can select the fields that will appear in the views in the Fields section.

To include a field in the view, check the checkbox in the Inc. (include) field.

For each field you will be able to specify a field alias and sort order.

Fields will be listed in the order you select them from the list.


You can adjust the field order using the Up and Down links.

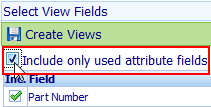
When creating multiple views, you can have the ViewManager determine which attribute fields to include by checking the
Include only used attribute fields option.

When this option is checked, the system will determine which attribute fields are in use by the items that will be included in the view and only include those attribute fields in the specific view.
The Options section provides a checkbox that allows you to include item data with all revisions or just the current revision.

If this option is checked, the views will contain all revisions, if not, the view will only report the current revision for each item.
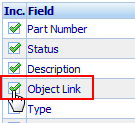
When selecting fields, the ViewManager will allow you to include an "Object Link" field.

If this field is included in the view, the view will contain a field that includes a URL (link) to the Item form in Desktop.

The URL field will be created based on the value specified in the Object Link URL field of the Options section.

Note: when setting the Object Link URL field you will only need to provide the server name and virtual directory for the Omnify Server (e.g. http://omnifyserver/Omnify5).
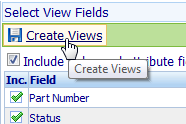
To create multiple views, click the Create Views button from the toolbar.

|
|