|
|
| Overview |
Companies need an effective tool to create, modify and manage the Bill of Materials used to manufacture their products.
While generic parts lists can be produced from most CAE/CAD systems, the information they contain is often insufficient for procurement.
- Additional items such as mechanical components (i.e. sockets) that are required
to manufacture a product, but are not generally included in the electrical design,
must be included in the final BOM for purchasing and manufacturing.
- Multiple configurations and revisions of the same design need to be controlled. For
example, a product that is manufactured with different components based on its global
destination must have different versions of the BOM even though the design may stay
the same.
- Automatic transfer of BOM data to PLM, PDM & ERP systems must be provided in
addition to printing readable BOMs.
OmniBOM allows you to combine all of your pertinent BOM data from various sources, to manage the BOM data effectively, and to produce outputs
that can automatically interface to Omnify Empower PLM.
OmniBOM is a fully functional editing and formatting tool designed to augment the creation and management of bills of material.
The OmniBOM User's Guide provides descriptions and illustrations on all of the functionality available with OmniBOM.
Some of the main functions of OmniBOM include:
-
Dynamic database linking: OmniBOM allows you to link directly to your Omnify database to browse and include items into your bill of materials.
-
BOM Import: OmniBOM will read files from many different formats (i.e. ASCII/Text, Excel, Word, Access, ODBC, etc.) to formulate a foundation for your final bill of material.
-
Interactive BOM Specification: OmniBOM allows you to create a Bill of Materials from scratch.
Simply enter or select column names and fill in the BOM data.
Optional headers, footers, and variable data can be quickly included.
-
Variant Sheets: You can manage different configurations or revisions of the same design within one BOM file using variant sheets.
Fully supported through Scripts and BOM Compares.
-
Automated Scripting: Scripting gives you the power to massage data within OmniBOM.
Providing you with an automated way of performing traditionally manual BOM processing tasks.
For example, if a certain electrical component requires a socket, OmniBOM will automatically add the socket as a separate line item to the BOM.
-
BOM Compare: OmniBOM's compare utility allows you to visually display and export the differences between two Bill of Materials or two variants of the same BOM.
-
Spreadsheet-like Editing: OmniBOM provides a full suite of editing functions.
You can easily edit quantities, add new fields, add items, sort, cut, copy, paste, and delete data.
Fields can be protected to prevent accidental modifications.
The user interface can be configured to your preferred settings for ease of use.
-
Customizable Exporting: OmniBOM can export to a variety of formats (Excel, Text, Word, HTML, etc.).
Users can customize headers, footers, variables, specific fields, field order, etc. when exporting.
|
 |
Integration with Omnify |
Top |
|
OmniBOM is an integral part of the Omnify tool suite.
It serves as both the BOM importing and BOM Exporting mechanism.
The BOM Importer within Omnify imports files in OmniBOM's native file format (.obx), as well as various other format (Excel, Text, Access, etc.).
When exporting BOMs from Omnify, you can specify to export to an OmniBOM file.
This will allow you to do any further processing (scripting) of the BOM once it is exported.
OmniBOM can open/load Omnify BOMs directly from the database for modifying as well as comparisons.
OmniBOM provides a simple Upload process that will create a BOM data set that can be loaded directly into the Omnify database.
OmniBOM also provides direct searching of the Omnify database to add BOM items and update data fields on the BOM with data from the Omnify database.
|
 |
Typical Omnify System Data Flow |
Top |
|

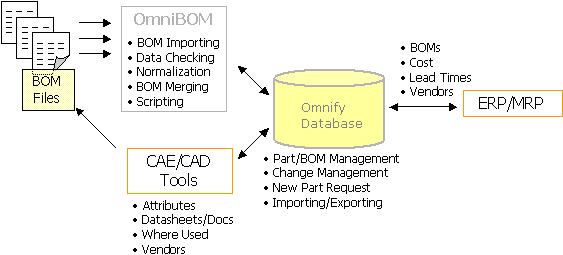
In the typical data flow, the Omnify database manages all of the parts, BOMs, and documents.
Omnify provides direct ODBC connections to the database that can be used directly in the Engineering environments (i.e. Schematic capture/mechanical drawing systems), such that part numbers, attributes, datasheets, etc. are automatically applied to the design files.
From the design environment, Bill of Materials can be generated in any file format and then read into OmniBOM.
OmniBOM provides the ability to import BOMs in any file format (ASCII/Text, Excel, CSV, etc.) and also provides an environment where you can customize, enhance, and "massage" the BOM data.
Tasks such as:
- Merging Mechanical and Electrical BOMs
- Automatically adding parts based on parameters (i.e., Fans, Heatsinks, etc.)
- Automatically managing "stuffing", or "population" options
- Data validity checks (Duplicate/missing reference designators, quantity mismatches, missing part numbers)
Once the BOM is complete in OmniBOM, you can then export to any file format, and produce any number of custom reports.
You can then import the OmniBOM file into Omnify as either a new BOM or as a new rev of an existing BOM.
|
 |
Installation/Setup |
Top |
|
OmniBOM is included in the Omnify Client Utilities package.
OmniBOM is a "client-based" utility that must be installed on a Microsoft Windows machine.
The Omnify Client Utilities can be accessed from the Omnify Server Home Page.
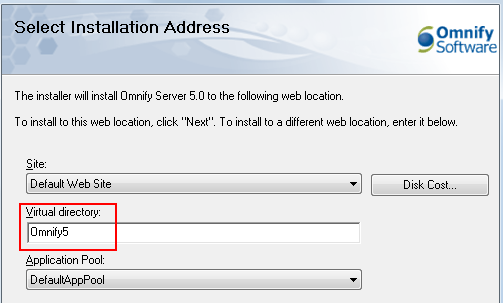
When the Omnify Server Installation is launched, you will be asked to provide a virtual directory where all Omnify Server Applications and Services will be installed.

Once the Server installation is complete, you can visit the Omnify Server Home Page using any web browser with the URL: http://[Server Name]/[Omnify Virtual Directory] (e.g. http://omnifyserver/Omnify5).

To download the Omnify Client Utilities, select the Omnify Utilities Home Page module from the Omnify Server Home Page.

This will redirect you to the Omnify Client Utilities Home Page.

To start the download, click the Download the Omnify Utilities Setup hyperlink

This will invoke your browser's file download dialog box, from the dialog box you can either run the .msi file directly or save it to a location.
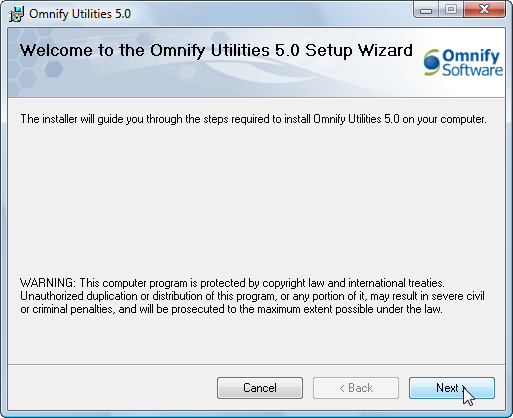
Once the .msi file has been downloaded, you can double-click to run it.
Note: if you have already installed the Client Utilities and would like to re-install, you will need to remove the existing installation first.

This will start the Omnify Client Utilities setup wizard.

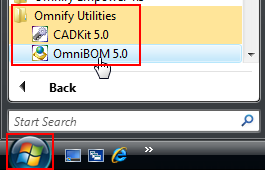
Once the installation is complete, you'll be able to launch OmniBOM from the Start menu.

|
|