|
|
| Overview |
|
This chapter describes some of the basic editing functions of OmniBOM, such as:
defining your BOM fields, adding, inserting, editing, copying, deleting and disabling line items, sorting and swapping columns.
|
 |
Launching/Login |
Top |
|
Once the installation is complete, you'll be able to launch OmniBOM from the Start menu.
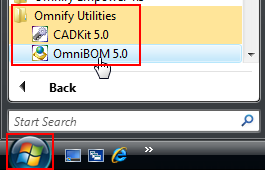
When launching OmniBOM, a login dialog box will appear.

From the Login dialog box, you must specify the Omnify database server and database name.
Note: contact your Omnify administrator or qualified Omnify Application Engineer if you do not know these settings.
The system will remember these settings after a successful login.

The Login dialog box will also require you to specify your Omnify user name and password.

Once the server, database, and user are specified, click the Login button to login to the Omnify database and launch OmniBOM.

|
 |
Creating a New BOM |
Top |
|
OmniBOM can be used for enhancing a BOM file generated by hand or another application (such as a BOM generation tool from a schematic capture or PCB design system) and for creating a new BOM from scratch.
When you launch OmniBOM, it will automatically start a new BOM window.

When a new BOM window is invoked, the BOM window will contain blank rows and default columns.
The default columns will be either blank columns or your user defined default column headings.
The default column option is defined in the Options dialog box.
Options include:
- Default row count
- Use generic field names
- Use specified column names
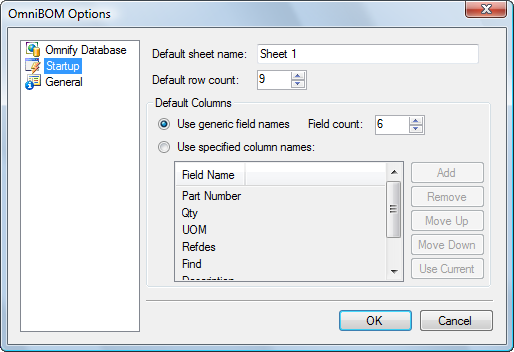
If you select the Use generic field names option, the BOM window will fill with blank rows and sequential letters as column names.

If you select the Use specified column names option, the BOM window will fill with blank rows and the user-defined column names.

You can create/launch a new BOM window by using the New command from the File menu or toolbar.
|
 |
BOM Window Anatomy |
Top |
|
The main BOM window contains the following areas:
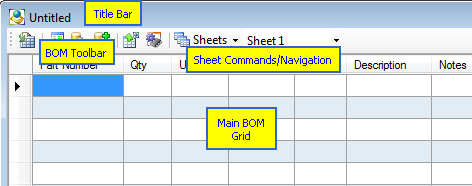
| Title Bar |
Contains the name (and type) of the currently open BOM file |
| BOM Toolbar |
Quick access to common BOM commands |
| Sheet Commands/Navigator |
Sheet listing and sheet commands
See the Working with BOM Sheets section for more information.
|
| Main BOM Grid |
BOM items/columns area |
The BOM Toolbar contains the following commands:

 |
File -> Import |
Import data from a file |
 |
Data -> Update All from Omnify |
Updates column with data from Omnify based on finding matches in the specified fields (e.g. Part Number, Vendor Part Number, etc.) |
 |
Data -> Find/Update from Omnify |
Updates the selected row with data from Omnify based on finding matches in the specified fields (e.g. Part Number, Vendor Part Number, etc.) |
 |
Add from Omnify |
Launches the database search to provide a way to add Omnify items to the BOM as rows |
 |
File -> Upload to Omnify |
Launches the BOM Upload form |
 |
Open Omnify Item |
Allows you to open the Desktop Item form for the selected row/item. Note: a part number field must be specified. |
Clicking the right mouse button while in the BOM grid will invoke a context sensitive menu with common BOM commands.
Commands will differ based on cell type (column header, row header, data cell) selected.
|
 |
BOM Fields/Columns |
Top |
|
BOM fields refer to the BOM columns.
BOM fields/columns can be named to provide a description of the data included in that field.

When a new BOM window is invoked, the BOM window will contain blank rows and default columns.
The default columns will be either "generic" (letters) columns or your user defined default column headings.


Refer to the Creating a New BOM section for more information on default columns.
To add a new column, select the Edit -> Add Column command.
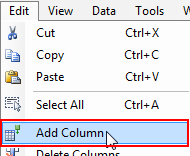
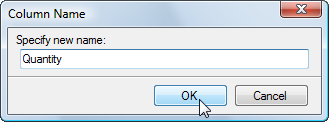
This will display the Column Name dialog box.
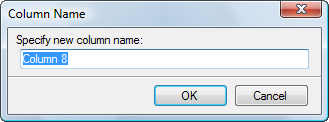
From the Column Name dialog box, specify a new column name and then click the OK button.
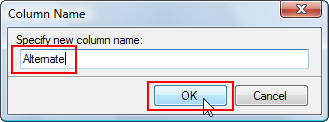
The new column will be added to the BOM window.

Note: the new column will be added as the last column.
You can insert a column at any desired location by clicking the right mouse button on a column header.
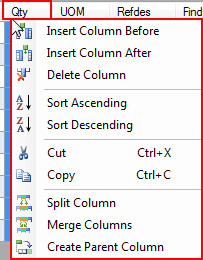
You can use the Insert Column Before and/or Insert Column After commands to insert the new column at the desired location.
To rename a field in the BOM window, double-click on the field heading cell

Double-clicking on any field header cell will invoke the Column Name dialog box:
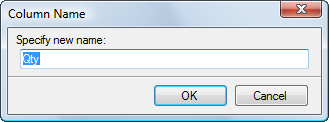
To rename the column, specify a new column name and then click the OK button.

To remove a field in the BOM window, click the right mouse button on the desired column.

Select the Delete Column command to remove the column.
To sort a field in the BOM window, click the right mouse button on the desired column.

This menu contains 2 different sorting options:
| Sort Ascending |
Sorts the data in the currently selected column in an ascending order (alphabetically) |
| Sort Descending |
Sorts the data in the currently selected column in a descending order (alphabetically) |
You can change/set the size of any column by clicking and dragging on the edge of the column header cells.

|
 |
Adding Items |
Top |
|
There are many ways to add items to a BOM such as:
- Manually - Add a blank item and type in the field data for that item.
- From a database - Parametrically browse the Omnify database and select the items.
- Import from a BOM file - Read a BOM file (i.e. parts list from a CAE/CAD tool).
- Pasting copied or cut items from the current BOM or any other BOM window/sheet.
For more information on importing and exporting BOM files please refer to the Importing and Exporting sections in this manual.
The BOM window will always present a new row of data.
This row will be identified with an asterisk (*) in the row header cell.
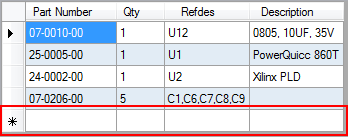
To manually add a new item/row to a BOM window, begin typing a value in the any field on the row marked with an asterisk (*).
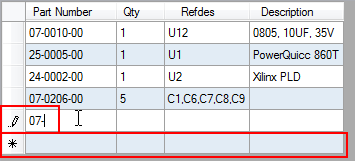
Once you begin typing, the system will automatically add the line and display the edit icon in the row header.
|
 |
Editing BOM Cells |
Top |
|
Within the BOM window you can manually edit any of the BOM cells.
To edit an individual cell, click the left mouse button within the cell to select.

You can then type into the cell directly.

Notice the edit icon will appear in the row header.

You can also use the standard windows hot keys to copy, cut, paste and delete (Ctrl+C, Ctrl+X, Ctrl+V, Delete) text within the cells.
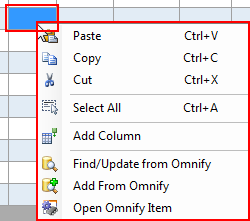
If you click the right mouse button while editing a cell a context sensitive menu will appear.
The menu will contain common cell editing commands.
|
 |
Selecting Items in a BOM Window |
Top |
|
To select a cell in a BOM window, click the left mouse button on the cell.
You can select multiple items by clicking and dragging over multiple items.
You can also use the Shift+Click and Ctrl+Click methods.
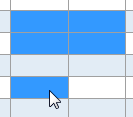
To select an entire row, select the row header cell (left column):

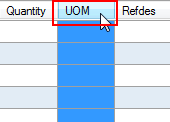
To select an entire column, select the column header cell (top row):
|
 |
Cutting , Copying, and Pasting |
Top |
|
Once you have a cell or cells selected, you can then use standard editing functions: Cut, Copy, Paste, and Delete.
- Cut - Remove/clear data from the selected cells. Data will be placed in the clipboard and can be used by the Paste command.
- Copy - Copies date from the selected cells, and places the data in the clipboard.
- Paste - Copies the data from the clipboard to the selected cells.
- Delete - Remove/clear data from the selected cells. Data will not be placed in the clipboard.
Note: you can also use the copy/paste operation by dragging and dropping from one cell to another.

|
 |
Deleting Items |
Top |
|
You can delete items/rows using the following manners:
- Delete single rows
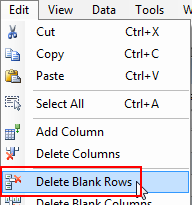
- Delete blank rows
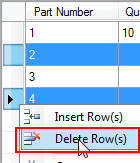
To delete a single row, first select the row(s) you wish to delete by selecting the row headers.
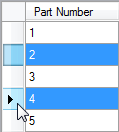
Then click the right mouse button and select the Delete Row(s) command
You can delete all blank rows using the Delete Blank Rows command from the Edit menu.
|
|