|
|
| Overview |
|
OmniBOM contains many powerful commands to handle bulk editing of BOMs.
|
 |
Merging Columns |
Top |
|
OmniBOM allows you to combine/concatenate data in multiple columns into a single column.
To combine columns select the Merge Columns command from the Data menu.

The Merge Column dialog box will list all of the current columns.

To add columns you wish to merge, select the column from the Merge Columns drop list and then click the Add button.

You can add as many columns as necessary.

You can change the data order by selecting the column(s) and using the Move Up and Move Down buttons.

You will then specify the new column name and separation character.

Optionally, you can have the system remove the merged columns by checking the Remove merged columns option.

Once the fields and separation character have been specified, click the OK button to merge the specified columns.
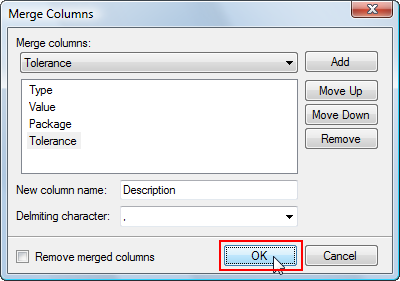
Example: Combine the Type, Value, Package, and Tolerance fields into a Description field.
Before the merge:

After the merge:

|
 |
Splitting Columns |
Top |
|
OmniBOM allows you to split/expand an individual column into multiple columns.
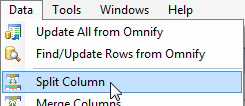
To split a column, select the Split Column command from the Data menu.
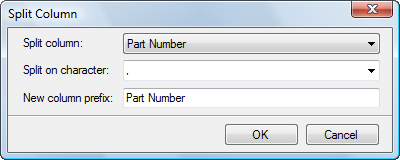
From the Split Column dialog box, you will need to specify the column you wish to
split and the separation characters to search for as field delimiting characters.

You can then specify a new column prefix.

OmniBOM will automatically determine the number of columns to create based on the field delimiters in each item.
Each new column to be created will contain the specified prefix followed by the new column count (e.g. Desc1, Desc2, etc.).
Example: Split the Description field into individual fields based on a comma separator.
Before the split:

After the split:

|
 |
Creating Parent Columns |
Top |
|
OmniBOM can create a column that represents a Parent Part Number column based on a defined "Level" field.
The "Level" column must have a numeric value that represents the level of indention.
To create a Parent Part Number column select the Create Parent Column command from the Data menu.
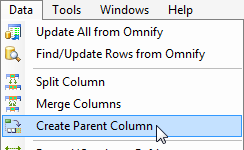
The Create Parent Column dialog box allows you to set the following options:
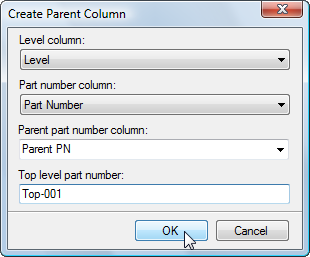
| Level column |
Select the "Level" column from the existing BOM fields.
Note: The "Level" column must have a numeric value that represents the level of indention
|
| Part Number column |
Select the Part Number column from the existing BOM fields |
| Parent Part Number Column |
Select or type in the name of the BOM field that will receive the Parent Part Number determined by OmniBOM |
| Top level (level 1) part number |
Specify the parent part number for all "Level 1" items |
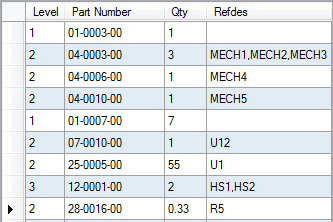
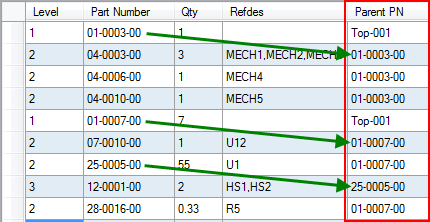
Example: create a Parent Part Number column based on each item's level of indention defined by the "Level" column.
Before creating the Parent column:
After creating the Parent column:
|
 |
Expanding Items |
Top |
|
OmniBOM provides you with commands to automatically expand (create multiple BOM items from a single BOM item) and consolidate (condense multiple BOM items into a single line item) items.
When expanding items, OmniBOM will look for delimiting characters in an individual field, then create multiple rows for each individual section found in that field.
To expand items, select the Expand Items command from the Data menu.
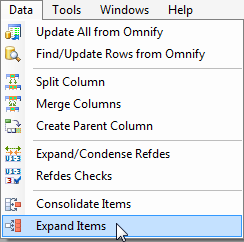
The Expand Items dialog box contains the following options/settings:
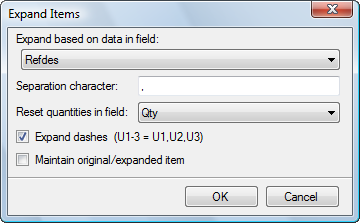
| Expand based on data in field |
Select the BOM field you which to search for expansion character in |
| Separation character |
The character to search the field for to determine item count |
| Reset quantities in column |
For expanded items, if a quantity field is present, OmniBOM can automatically set the quantity field to 1. |
| Expand dashes |
Expand items where a dash is used to specify multiple items (numerically compressed) such as reference designators.
e.g.: 1-4, would represent 1, 2, 3, and 4
|
| Maintain original/expanded item |
For items that are expanded, OmniBOM can optionally remove (or keep) the BOM item it expanded. |
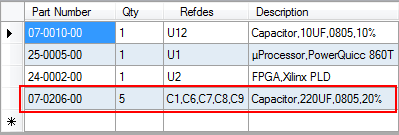
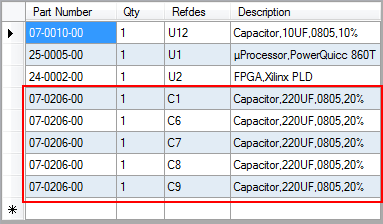
Example: Expand each individual reference designator, so that each appears on a separate line in the BOM.
Before expanding the items:
After expanding the items:
|
 |
Consolidating Items |
Top |
|
OmniBOM provides you with commands to automatically expand (create multiple BOM items from a single BOM item) and consolidate (condense multiple BOM items into a single line item) items.
When consolidating items, OmniBOM will search the entire BOM for matching items in a defined field, and condense the duplicate items into a single BOM item.
To consolidate items, select the Consolidate Items command from the Data menu.
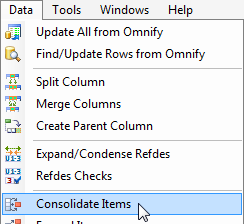
The Consolidate Items dialog box contains the following options/settings:
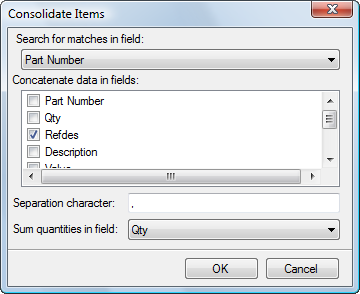
| Search for matches in field |
Select the BOM field that you want OmniBOM to search to find matches |
| Concatenate data in columns |
Check the fields that you want OmniBOM to condense field data when matches are found. |
| Separation characters |
Characters you want OmniBOM to use when concatenating field data |
| Sum quantities in field |
Select the current Quantity field |
Example: Consolidate items where the part number appears on multiple/separate lines in the BOM.
Before consolidating the BOM:

After consolidating the BOM:

|
 |
Expanding/Compressing Reference Designator |
Top |
|
OmniBOM can automatically expand and condense reference designator fields.
For example, reference designators represented as: U1,U2,U3,U4,U5,U8,U10,U11,U12
can automatically be converted to be represented as: U1-U5,U8,U10-U12 and vice-versa.
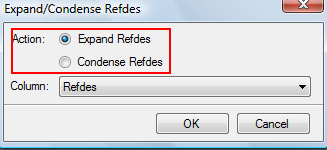
To expand or condense reference designator fields, select the Expand/Condense Refdes command from the Data menu.
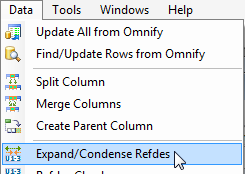
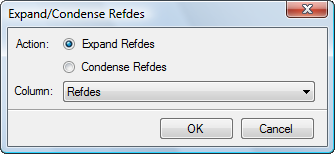
From the Expand/Condense Refdes dialog box, you will select the BOM fields you wish to condense or expand.
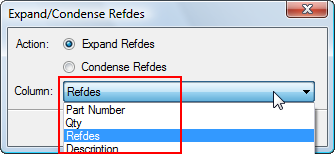
You can then set the Action option to either: Expand Refdes or Condense Refdes.
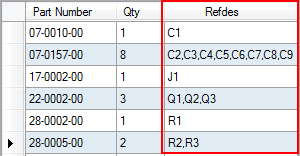
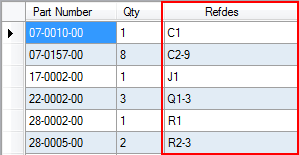
Example: Condense the References in the "Refdes" field.
Before condensing the field:
After condensing the field:
|
 |
Reference Designator Checks |
Top |
|
OmniBOM can check reference designator fields for the following issues:
| Quantity/Refdes Mismatches |
Determines if there are any mismatches in the defined quantity and the number of reference designators assigned |
| Duplicate Refdes |
Determines if a specific reference designator is used on multiple items in the BOM. |
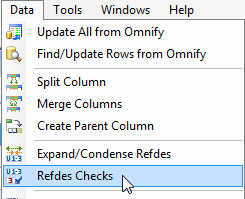
To perform these tests, select the Refdes Checks command from the Data menu.
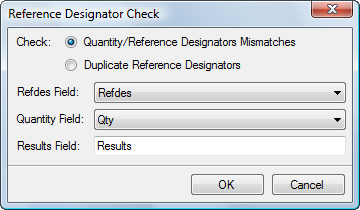
OmniBOM can check a defined "quantity" field against a "reference designator" column to determine if there are any mismatches in the defined quantity and the number of reference designators.
Reference designators can be delimited with a comma (U1,U2,U3,U5) or compressed with a dash character (U1-U3,U5).
To check for mismatches, select the Quantity/Reference Designators Mismatches option.
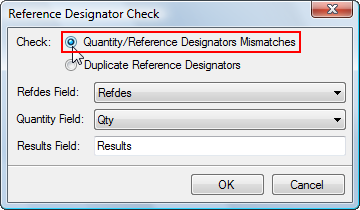
From the Reference Designator Check dialog box, you must then select the Refdes and Quantity fields.
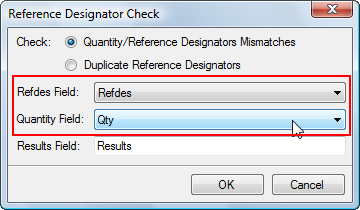
You can then select or type the name of a "Results" field.
The Results field will display the results of the check.
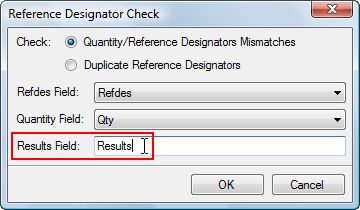
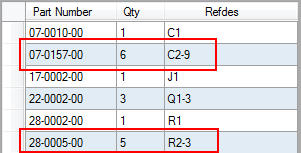
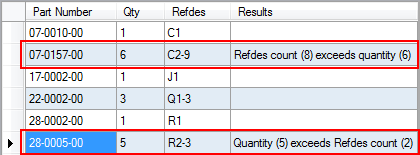
Example: Check the "Refdes" and "Qty" column for mismatches.
Before the check (Notice 2 items have mismatches):
After the check:
OmniBOM can check a defined "reference designator" column to determine if a reference designator is used anywhere else in the BOM.
Reference designators can be delimited with a comma (U1,U2,U3,U5) or compressed with a dash character (U1-U3,U5).
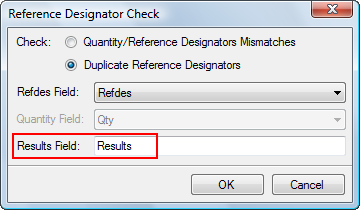
To check for duplicate reference designators, select the Duplicate Reference Designators option.
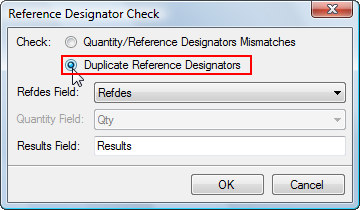
From the Reference Designator Check dialog box, you must then select the Refdes field.
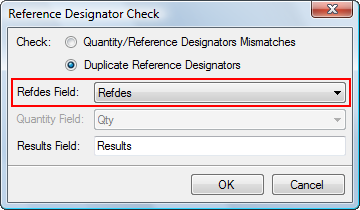
You can then select or type the name of a "Results" field.
The Results field will display the results of the check.
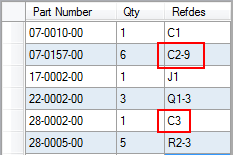
Example: Check the "Refdes" field for duplicates.
Before the check (Notice C3 is used on 2 items):
After the check:

|
|