|
|
| Overview |
BOM Routings follow a similar status/signoff process to that of Omnify Items.
When a BOM Routing is created, it will be placed in a "Pending" state.
A signoff workflow can be assigned to the routing.
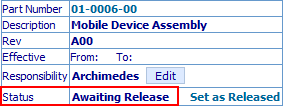
Once all required users have approved the routing, the routing will be placed in an "Awaiting Release" state.
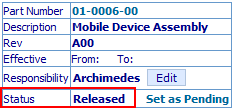
Users with routing editing permissions can then "Release" the routing.
The General/Operations page will display the routing status.

To view, assign, and signoff (approve or reject) the routing workflow, click the Signoff tab from the Routing form navigation bar.

The Signoff page will display the currently assigned workflow.
A workflow consists of stages and users.
The workflow can contain an unlimited number of stages and each stage can contain an unlimited number of users.

While the item is pending, the workflow will contain an active stage.
Users on the active stage can signoff simultaneously.
Users on inactive stages will not be alerted (become active) once the prior stage(s) have been completed.
Once all required users of a stage have approved the item, the system will automatically activate the next stage.
Stages can contain a reject stage.
If any user of a stage rejects the item, the system will activate the "reject to" stage.

Users on a stage can be either "Required" or "Reviewers".

Reviewers will not be required to "sign" the item; however they will be included in the email notices.
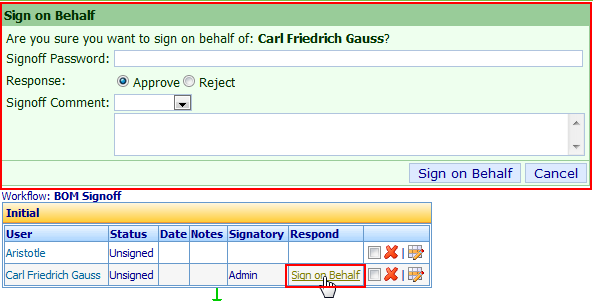
Users can contain an "Authorized Signatory".
The Signatory represents a user who can sign on another user's behalf.

|
 |
Assigning Workflows and Users |
Top |
|
To assign a workflow to a routing, select the Signoff page on the Navigation Bar.

Clicking the Add toolbar button will display the Add to Workflow dialog box.
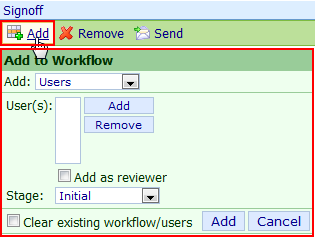
From the Add to Workflow dialog you will be able to select what type of object you wish to add.

A Workflow Map is created by the Omnify Administrator and consists of stages and users as well as object mapping properties.
The system uses the object mapping properties to determine which workflow should be applied to an object when automatically assigning a workflow.
Automatic workflow assignment will occur when a user creates a new (non-draft) object using the New Object wizard.
Workflow maps can also be assigned interactively.
To assign a workflow map, select the Workflow Map option from the Add drop list.

The dialog box will present the user with a list of Workflow Maps.

When assigning a workflow map, the system will automatically clear the current workflow and users.

To assign the workflow map, click the Add button.

A Workflow is created by the Omnify Administrator and consists of stages and users.
Users assigned to the stages can be either required to sign off or "reviewers".
To assign a workflow, select the Workflow option from the Add drop list.

The dialog box will present the user with a list of Workflows.
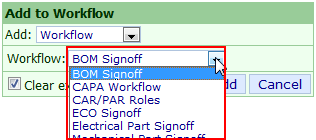
When assigning a workflow, you will have the option to clear the current workflow or append the stages of the workflow to the current workflow.
Checking the Clear existing workflow/users option will clear the current workflow and assign the new one.
Unchecking the Clear existing workflow/users option will append the workflow stages to the existing workflow.

To assign the workflow, click the Add button.

A Workflow Stage is created by the Omnify Administrator and consists of a list of users.
Users assigned to the stages can be either required to sign off or "reviewers".
To add/assign a stage, select the Stage option from the Add drop list.
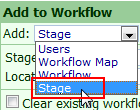
The dialog box will present the user with a list of Stages.
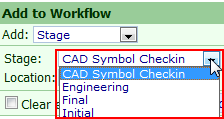
When adding a stage, you will be able to identify the position of the stage in the current workflow.
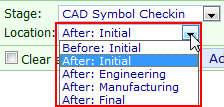
When assigning a stage, you will have the option to clear the current workflow or append the stage to the current workflow.
Checking the Clear existing workflow/users option will clear the current workflow and assign the new stage.
Unchecking the Clear existing workflow/users option will add the stage to the existing workflow.

To assign the stage, click the Add button.

To add users to a stage, select the Users option from the Add drop list.

The dialog box will present the user with a list to select users.

To select users to add to a stage, click the Add button.

This will present the Omnify Object Search form.
You can select a user by clicking the user name hyperlink, or multiple users by checking the checkbox and then clicking the OK button.
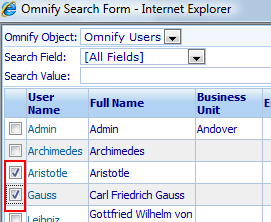

The selected/checked users will appear in the Users list.

When adding users you can assign them as either required (for signoff) or reviewer.
To assign the users as reviewer, check the Add as Reviewer option.

When adding users you can select which stage the users will appear in by specifying the stage in the Stage drop list.

When adding users, you will have the option to clear the current workflow or append the users to the current workflow.
Checking the Clear existing workflow/users option will clear the current workflow and assign the new stage.
Unchecking the Clear existing workflow/users option will add the stage to the existing workflow.

To assign the users, click the Add button.

To remove a user from the workflow, click the Remove icon in the Actions column for the user you wish to remove.

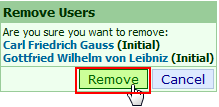
You will be asked to validate the removal.

You can remove multiple users by checking the checkbox in the Actions column and clicking the Remove toolbar button.
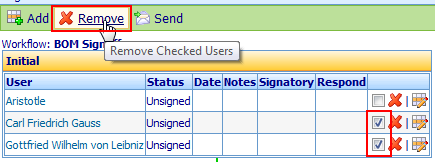
You will be asked to validate the removal.
You can change a user from required to reviewer (and vice-versa) and assign a signatory by clicking the Modify User icon in the Actions column.

The Modify User dialog will display the user options.

To assign the user as a "Reviewer", uncheck the Required for signoff option.
To assign the user as "Required", check the Required for signoff option.

To assign a signatory, you can either type the user's name or use the ... (browse) button to search/find a user.

Once the desired settings are applied, click the Modify User button to update the workflow user.

|
 |
User Signoff |
Top |
|
The Inbox in Omnify Desktop will list all active routing signoffs.
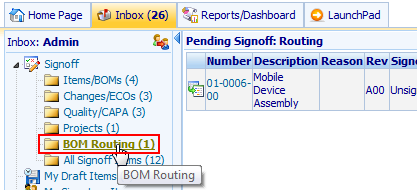
To sign off on a routing, select the Signoff tab from any routing page.

If you are active for signoff, the Response column will contain hyperlinks for approving or rejecting the routing.

To approve or reject, click the appropriate hyperlink.

You will be asked to validate your response. You can also add a signoff comment.

If approval passwords are required (Omnify Administrator), the user will be asked to provide the signoff password.

Click the Approve or Reject button to validate your response.
Your signoff status will be displayed on the workflow.

|
 |
Releasing Routings |
Top |
|
Once all required workflow users have approved the routing, it will be placed in an "Awaiting Release" state.

To "Release" the routing, select the General tab from any routing page.


To release the Routing, click the Set as Released hyperlink.
You will be asked to confirm the release. Click the Release Item button to release the routing.

The Status field will update to indicate a released state.

|
|