|
|
| Overview |
Document Vaults provide you with a way to group/classify vaulted documents.
The "vaults" are not physical locations.
When defining User Permissions, you can define which users can access documents associated with a document "vault".
Document Vault settings appear on the Document Properties dialog box when adding or modifying documents.
When vaulting a document, the user can choose from a "local" file or use a "Shared File Area" file.

When using a "local" file upload the system will transfer the file from the user's location to the server using the web upload process.
Once the file has been uploaded to the server, the Omnify Web Services will then determine where to place the file for its final destination based on the vaulting settings.
Using this process, the entire contents of the file will be transferred through the browser which could result in a large amount of resource and network bandwidth utilization.
Using this process is also subject to size and time delay restrictions that may be placed on the web server for security reasons.
To avoid the network bandwidth utilization and possible size and time restrictions, Omnify allows you to define "Shared File Areas".
A "Shared File Area" is a directory/folder that is made available to the Web Services to avoid the upload process.
Using the "Shared File Area" allows the user to browse for a file in the specified folder (or sub folder), however when the "Add" or "Check-in" process occurs the Web Services read the file directly from the Shared location and then determines where to place the file for its final destination based on the vaulting settings.
Using this process, the file is not transferred through the browser, thus providing a quicker "upload" process that avoids potential size and timeout restrictions placed on the web server.
|
 |
Document Vaults |
Top |
|
Document Vaults provide you with a way to group/classify vaulted documents.
The "vaults" are not physical locations.
When defining User Permissions, you can define which users can access documents associated with a document "vault".
Document Vault settings appear on the Document Properties dialog box when adding or modifying documents.
To modify vaults, select Document Vaults from the Options drop list.

To add a vault, click the Add toolbar button.
This will present the New Vault dialog box.

When adding a Document Vault you can specify the following:
| Name |
Vault name/label |
| Description |
Description of vault |
To add the vault, specify the name, and then click the Add button.

To remove a vault, click the Remove hyperlink from the Actions column.

|
 |
Shared File Areas |
Top |
|
When vaulting a document, the user can choose from a "local" file or use a "Shared File Area" file.

Using "Shared File Area" documents provides a way for the system to avoid time-consuming and potentially restricted web upload processes.
Using Shared File Areas, the administrator provides a list of file folders that are accessible to the web service "owner" (usually NETWORK SERVICE, aspnet, or impersonator).
Users will be able to browse the specified folders (and sub-folders) when adding documents in Desktop.
To modify vaults, select Shared File Areas from the Options drop list.

To add a shared file area, click the Add toolbar button.
This will present the New Shared Area dialog box.

When adding a Shared File Area you can specify the following:
| Folder Path |
Path of local or shared folder area |
| Alias |
Name that will be displayed to the user |
To add the Shared File Area, specify the folder and alias and then click the Add button.

Note: the folder path is the path that is known to the web server and not the users.
Thus, local server drives can be defined using local drive names/paths.

Users will be able to browse the defined shared file areas within Desktop.

To browse the folder when adding a file in Desktop, the user must select the Vault from Shared Area option and then click the Browse button.

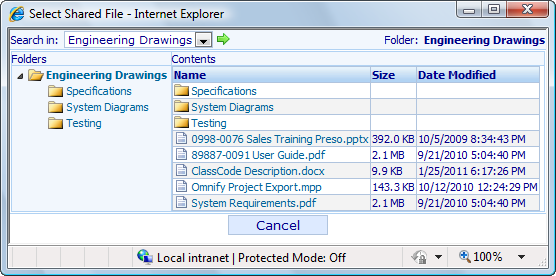
This will present the Shared File browser.

You will be able to select from the available folder areas (by Alias) using the Search in drop list.

The left side will provide a folder navigator to view any sub-folders.

You can back up one level by clicking the [...].

The files view will display all sub-folders and files of the selected folder.

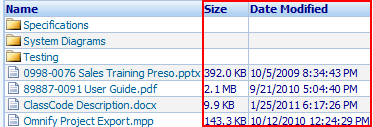
The files view will also display the file size and last modified date.

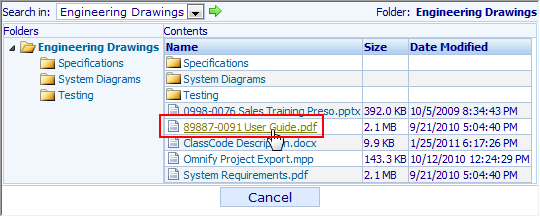
To select a file, click the hyperlink on the file name.

The file path and name will be added to the form.

|
|