| Overview |
The Omnify Administrator contains all the mechanisms to create, control, and manage database users. The database administrator creates user logons with passwords, permissions, and email information. Users can be added to groups to classify their database interaction.
Omnify administrator’s default log-on is set to:
| User Name: |
admin |
| Password: |
admin |
It is highly recommended that the end user change this setting after installation.
Note: passwords are case-sensitive.
The User Information Options page allows you to perform the following user tasks:
| • Add/Edit/Remove Database Users |
| • Set users' passwords |
| • Define a user's email address |
| • Define a user's database permission group |
| • Assign a user to a Business Unit |
| • Assign an Authorized Signatory |
|
 |
User Page Navigation |
Top |
|
The User Information page contains the following areas:

| Toolbar |
Contains commands for entire list |
| Search/Filter |
Allows you to filter the user list for a specific set of users |
| User List/User Commands |
Lists all users based on search/filter, and provide user specific commands (Actions column) |
|
 |
Searching/Filter |
Top |
|
The Search/Filter area allows you to limit the number of users displayed in the Users list.
To specify a filter, first select the field you wish to filter.

Then specify a field value to filter on and click the Apply button to apply the filter.

You can also use the Name Filter to filter the list based on the user's full/first name.
The Name Filter provides you with character ranges.
Selecting a name range will filter the list to those users whose name begins with a letter in that range.


You can clear the name filter by clicking the All hyperlink.

You can have the Administrator remember the filter from session to session by checking the Remember Filter checkbox

|
 |
User Information |
Top |
|
The User Information page will display a list of all of the users.
User information includes:

| Status |
Displays a user's account status (Active, Disabled, or Locked) |
| User/Login |
User's login name |
| Full Name |
User's full name, this is the name that will appear whenever a user is listed |
| Email |
Email address of the specified user |
| Permission |
Database permission group for the specified user |
| Signatory |
User who can sign off on this user's behalf |
| Admin |
Displays whether or not the user has Administrative privileges |
| Comment |
General Comment about a user |
| Business Unit |
User's business unit |
|
 |
Adding Users |
Top |
|
To add a new database user, click the Add User button.

This will invoke the User Properties dialog box.
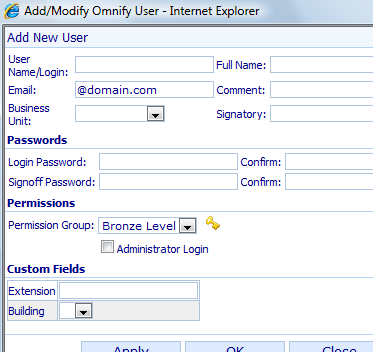
From the User Properties dialog box you can specify the following fields:
| User Name/Login |
Specify the user's login name |
| Full Name |
Specify the user's full name |
| Email |
Specify the user's email address |
| Comment |
User comment |
| Business Unit |
Select the user's business unit |
| Signatory |
Specify a user who can sign on this user's behalf |
| Login Password |
Select the user's default login password (note: users can change their passwords) |
| Signoff Password |
Select the user's default signoff password (note: users can change their passwords) |
| Permission Group |
Select the user's permission group |
| Administrator Login |
Check if user will be allowed to login to the Administrator |
Once all fields are set, click the Apply or OK button to create the new user.
|
 |
Enabling/Disabling Users |
Top |
|
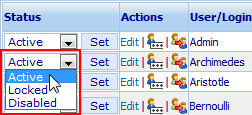
Database user status can be:
| Active |
User can login to system and execute enabled operations |
| Disabled |
User can not login to system all signoff activity will be disabled for this user however all historical events will be maintained for all users |
| Locked |
User attempted login with invalid password. The user account will need to be unlocked by an administrator or the user will have to wait the allotted time before attempting to login again |
To change/set a user's status, select the desired status in the Status column, and then click the Set button.

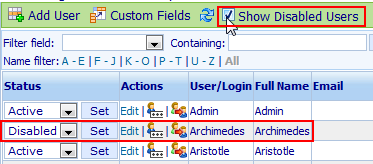
You can show or hide the disabled users by checking/unchecking the Show Disabled Users option.
|
 |
Modifying Users |
Top |
|
To modify a database user, click the Edit hyperlink in the Actions column.

This will invoke the User Properties dialog box.
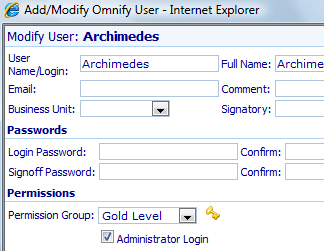
From the User Properties dialog box you can modify the following fields:
| User Name/Login |
Specify the user's login name |
| Full Name |
Specify the user's full name |
| Email |
Specify the user's email address |
| Comment |
User comment |
| Business Unit |
Select the user's business unit |
| Signatory |
Specify a user who can sign on this user's behalf |
| Permission Group |
Select the user's permission group |
| Administrator Login |
Check if user will be allowed to login to the Administrator |
Note: when editing a user, you will not be able to modify the user's passwords.
Once all fields are set, click the OK button to save the changes.
|
|
|
To reset user passwords, click the Reset Password icon in the Actions column.
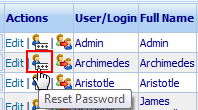
This will invoke the Reset Password dialog box.
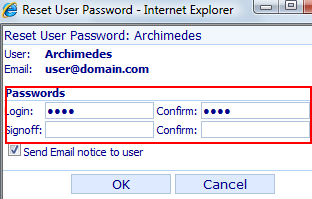
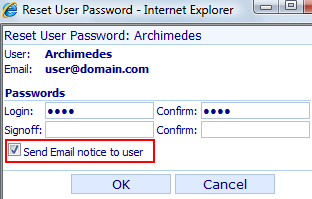
You can specify new passwords and optionally send an email to the user signifying the password change.
|
 |
Custom User Fields |
Top |
|
You can assign up to 10 custom fields to every user.
To modify custom fields, click the Custom Fields button.
This will display the custom fields selection list.
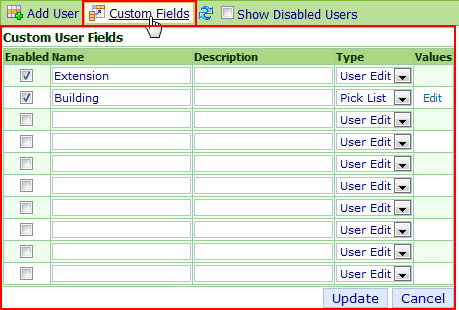
To enable a custom field, click the Enable checkbox.

Then specify a name in the Name column.

When defining the field, you can define the field value type to be either User Edit or Pick List.

Once the fields are defined, click the Update button.
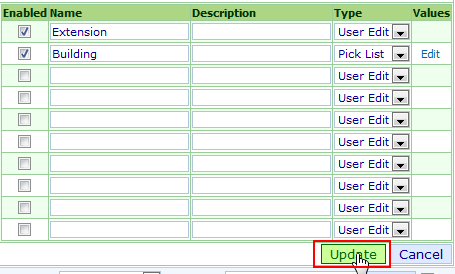
Custom Fields will appear as separate columns in the User Information page.

When adding or editing Users, you will be able to define the custom field values on the Custom Fields area.
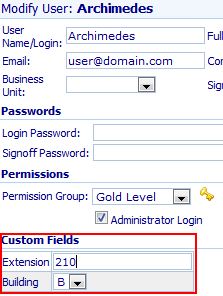
For Pick List fields, you can define the field values by clicking the Edit hyperlink.

This will launch the Field Values dialog box.
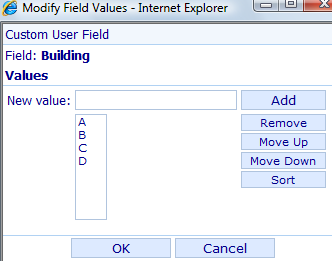
To add values, type the new value in the New Value field and then click the Add button.
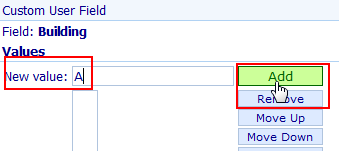
Note: you can specify multiple values to be added at once using a semi-colon as a delimiter.

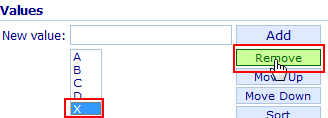
To remove values, select the entries in the Values list and click the Remove button.
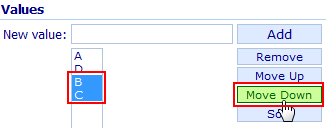
You can change the order by selecting the entries and clicking the Move Up and Move Down buttons.
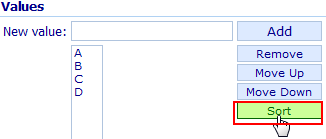
You can sort the list alphabetically by clicking the Sort button.
|