| Overview |
User groups are a way to combine multiple database users into a single group.
User groups can help describe relationships and responsibilities among database users.
Groups can be defined in any manner you see fit.
Examples:
| By Job Description |
| • Electrical Engineers |
| • Mechanical Engineers |
| • Engineering Managers |
| |
| By Department |
| • Purchasing |
| • Document Control |
| |
| By Project Groups |
| • Saturn Group Members |
| • Jupiter Group Members |
| • Neptune Group Members |
Whenever a user list is displayed (e.g. when selecting signoff users), the User Groups will also be displayed.
Users will be able to select individual users of a group or the entire group.
|
 |
Adding Groups |
Top |
|
To add a user group, click the Add Group toolbar button.

When adding a User Group you can specify the following:
| Group Name |
User Group name/label |
| Description |
Description of user group |
To add the group, specify the name, and then click the Add Group button.
|
 |
Removing Groups |
Top |
|
To remove a User Group, first select the group from the drop list.

Then click the Remove Group toolbar button.
You will be asked to verify the group removal.

|
 |
Modifying User Groups |
Top |
|
To modify a User Group, first select the group from the drop list.

Then click the Edit icon.

This will present the Edit Group dialog box.
You can change the name and description and click the Update button to store the changes.
|
 |
Group Users |
Top |
|
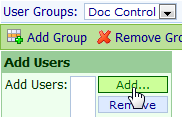
To add users to a User Group, first select the group from the drop list.

Then click the Add Users button.
This will present the Add Users dialog.

From the Add Users dialog, click the Add... button.

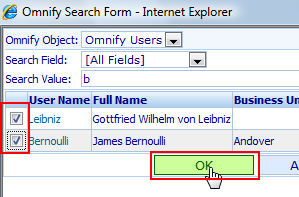
From the User Search form, select the desired user by checking the Select checkbox, and then click the OK button.

The selected users will appear in the Add Users dialog.
Click the Add User(s) button to add them to the group.

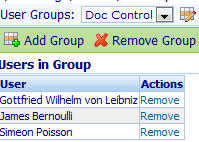
The new users will appear on the Users in Group list.

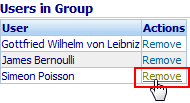
To remove users, click the Remove hyperlink.

You will be asked to verify the removal.

|