| Overview |
The HelpDesk Ticket Options page allows you to modify the following types:
- HelpDesk Ticket Types
- HelpDesk Ticket Categories
- HelpDesk Ticket Priorities
- HelpDesk Ticket Status
- HelpDesk Ticket Custom Fields
You can change the data set by selecting an available option in the drop list.

|
 |
HelpDesk Ticket Types |
Top |
|
HelpDesk Ticket types can be assigned to tickets for classification and reporting purposes.
To modify Ticket types, select the Ticket Types option from the drop list.

Ticket Type options will be available when defining a Ticket in the HelpDesk.


To add a Ticket type, click the Add toolbar button.
This will present the New Type dialog box.

When defining a type, you can set the following fields/options:
| Name |
Ticket type label/identifier |
| Description |
Description of Ticket type |
| Number Prefix |
Prefix to be used for the Auto Number scheme |
| Autonumber Group |
Auto Number scheme to be used for the Training type |
| Default Owner |
Default user who should be the owner of issues of this type |
Once all fields/options are set, click the Apply or Add button to create the Ticket type.
To modify a Ticket type, click the Edit hyperlink in the Actions column.
This will present the Edit Field dialog box.
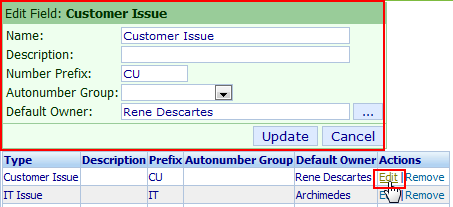
Once the desired changes are made, click the Update button to save the changes.
To remove a Ticket Type, click the Remove hyperlink in the Actions column.

|
 |
HelpDesk Ticket Categories |
Top |
|
HelpDesk Ticket Categories can be assigned to tickets for classification and reporting purposes.
To modify Ticket categories, select the Ticket Categories option from the drop list.

Ticket Category options will be available when defining a ticket in the HelpDesk.

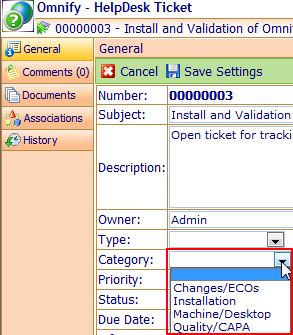
To add a Ticket category, click the Add toolbar button.
This will present the New Category dialog box.
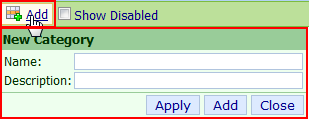
When defining a category, you can set the following fields/options:
| Name |
Ticket category label/identifier |
| Description |
Description of Ticket category |
Once all fields/options are set, click the Apply or Add button to create the Ticket category.
To modify a Ticket category, click the Edit hyperlink in the Actions column.
This will present the Edit Field dialog box.
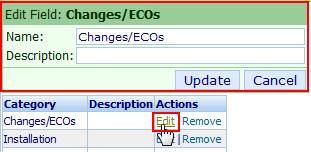
Once the desired changes are made, click the Update button to save the changes.
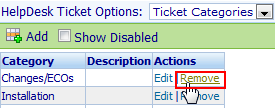
To remove a Ticket Category, click the Remove hyperlink in the Actions column.
|
 |
HelpDesk Ticket Priorities |
Top |
|
The Ticket Priorities option allows you to define a list of Priorities that are used to define and classify the importance of HelpDesk Tickets.
To modify Ticket Priorities, select the Ticket Priorities option from the drop list.

Priorities options will be available when defining tickets in Omnify HelpDesk.

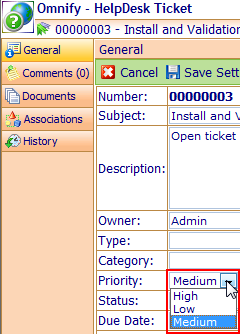
To add a priority, click the Add toolbar button.
This will present the New Priority dialog box.
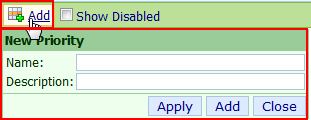
When defining a priority, you can set the following fields/options:
| Name |
Priority label/identifier |
| Description |
Description of priority |
Once all fields/options are set, click the Apply or Add button to create the priority.
To modify a priority, click the Edit hyperlink in the Actions column.
This will present the Edit Field dialog box.
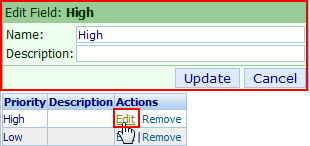
Once the desired changes are made, click the Update button to save the changes.
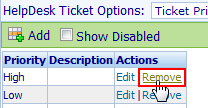
To remove a Priority, click the Remove hyperlink in the Actions column.
|
 |
HelpDesk Ticket Status |
Top |
|
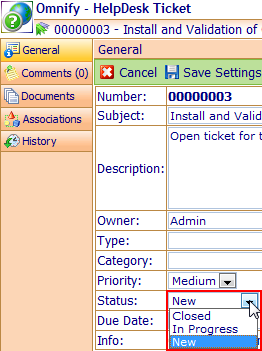
The Ticket Status options allows you to define a list of Statuses that are used to define and classify the state of a HelpDesk Ticket as well as define if the ticket is considered to be "Closed".
To modify Ticket Status options, select the Ticket Status option from the drop list.

Ticket Category options will be available when defining a ticket in the HelpDesk.

To add a status, click the Add toolbar button.
This will present the New Status dialog box.
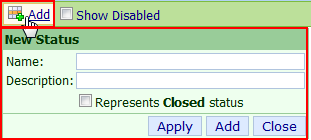
When defining a status, you can set the following fields/options:
| Name |
Status label/identifier |
| Description |
Description of Status |
| Represents Closed status |
If this option is checked, when a ticket is assigned this status, the ticket will be considered to be closed. |
Once all fields/options are set, click the Apply or Add button to create the status option.
To modify a status, click the Edit hyperlink in the Actions column.
This will present the Edit Field dialog box.
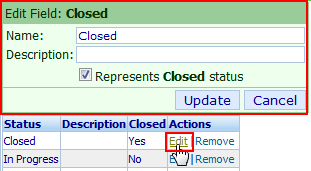
Once the desired changes are made, click the Update button to save the changes.
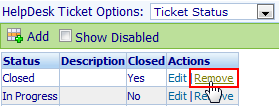
To remove a Status, click the Remove hyperlink in the Actions column.
|
 |
HelpDesk Ticket Custom Fields |
Top |
|
HelpDesk Tickets can contain up to 4 custom fields.
To modify custom ticket fields, select the Custom Fields option from the drop list.

Custom fields created on this page will appear on the ticket form when creating or modifying the ticket.

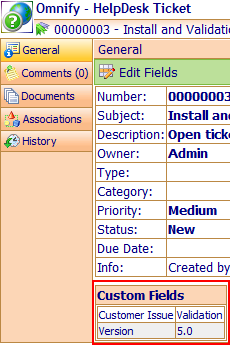
To enable a custom field, specify a field name in the Name column.

Then click the Enable checkbox.

When defining the field, you can define the field value type to be either User Edit or Pick List.

Once the fields are defined, click the Save Settings toolbar button.

For Pick List fields, you can define the field values by clicking the Set Values hyperlink.

This will launch the Field Values dialog box.
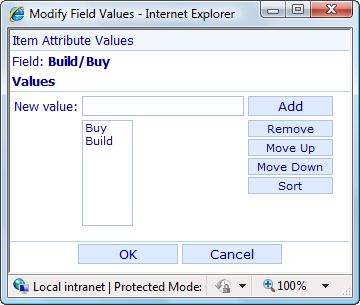
To add values, type the new value in the New Value field and then click the Add button.
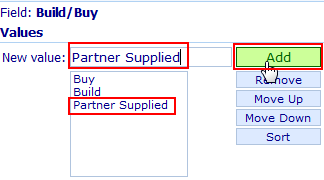
Note: you can specify multiple values to be added at once using a semi-colon as a delimiter.


To remove values, select the entries in the Values list and click the Remove button.


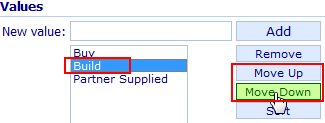
You can change the order by selecting the entries and clicking the Move Up and Move Down buttons.
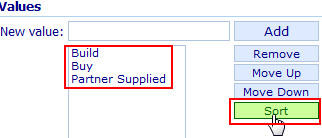
You can sort the list alphabetically by clicking the Sort button.
|