|
|
| Overview |
Once you have logged in to the Omnify Desktop, you will be redirected to the Omnify Desktop Home Page (unless you are accessing a specific form/page).
The Desktop Home Page contains the following key areas:

| Banner |
Provides user information as well as links to common functionality |
| Object Viewer |
Provides you with quick access to database objects, forms, and reports |
| Page/Tab Data Area |
This area will provide data based on the selected tab |
The Page/Tab Data Area will update based on the currently selected tab.

All tabs/pages are described in the following sections.
|
 |
Home Page Banner |
Top |
|
The Home Page banner area provides user information as well as links to common functionality.

The upper right section of the banner contains the following links:

| Refresh |
Refreshes/reloads the Home Page and all of its contents |
| Logout |
Logs you out of the Omnify Desktop and returns you to the Omnify Server Home Page |
| About |
Displays the application/system information (versions, databases, etc.) |
Note: clicking the icon in the upper left area will return you to the Omnify Server Home Page without logging you out of Desktop.

The User Information section of the Home Page will display the user name, type of license checked out, and the current date.

The banner also contains an area to perform object Keyword Searches.

To launch a Keyword Search, select the object you wish to search.
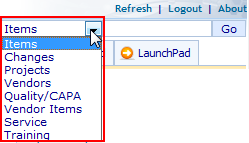
Next, specify a term you wish to search on and click the Go button.

The Keyword Searches form will appear and the results will be displayed.

|
 |
Page/Tab Data Area |
Top |
|
The Page/Tab Data area provides 4 tabs:

| Home Page |
Customizable links, recent items, and bookmarks |
| Inbox |
Pending items that the user is active on |
| Reports/Dashboard |
Customizable reports and LiveData objects |
| LaunchPad |
Simplified user interface and quick access to Omnify objects and forms |
Selecting the tab will update the data page area with data from that specific section.

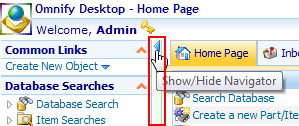
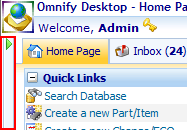
You can maximize the data page area (and minimize the Object Viewer) using the Show/Hide icons on the page splitter bar.
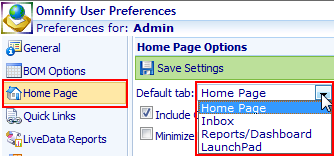
Users can set the default tab from the User Preferences form.
|
 |
Home Page Tab |
Top |
|
The Home Page tab contains the following 4 lists:
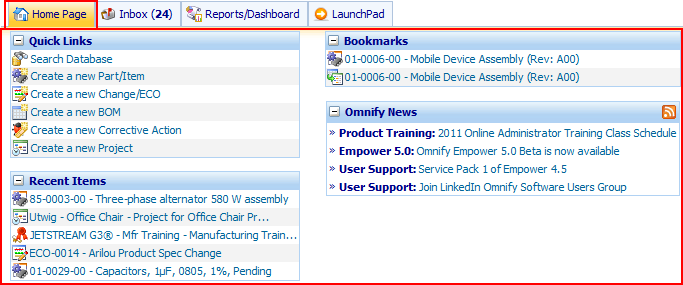
| Quick Links |
Customizable list of common operations, object forms, or general hyperlinks |
| Recent Items |
Links to your recently opened objects |
| Bookmarks |
You can bookmark any Desktop object, this list will contain your bookmarked objects |
| Omnify News |
RSS feed from Omnify's web site for news and upcoming events |
You can hide and show the contents of the lists by clicking the Expand/Compress icon in the group header.

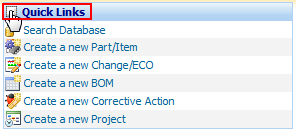
The Quick Links list can be customized from the User Preferences form.

The Quick Links section is where you can define the links.

To add a link, click the Add Link button.
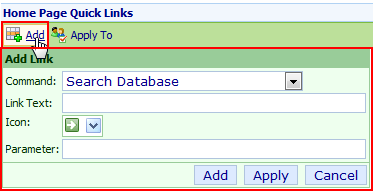
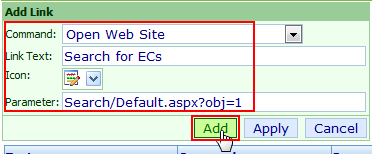
From the Add Link dialog, you can specify the Command, Icon, Text, and parameters of the link.
Click the Add or Apply button to add the link.
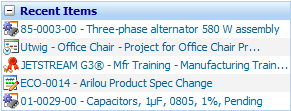
As you open various objects in Desktop, the objects will appear in the Recent Items list.
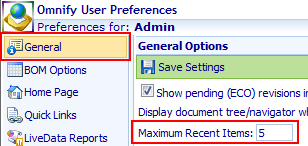
You can control the number of items that will appear in this list from the User Preferences form.

From any object form, you can use the object banner quick menu to set a bookmark on the form.
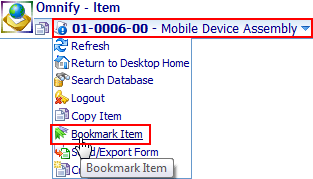
"Bookmarked" objects will appear in the Bookmarks list.

The Omnify News list will display news and events from a Really Simple Syndication (RSS) feed on the Omnify web site.

You can show/hide this list by enabling/disabling the Include Omnify News Links option in the User Preferences form.
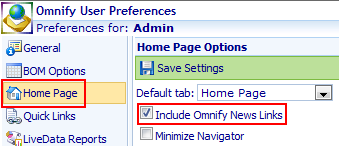
Note: Omnify administrators can disable the option for all users in the web.config settings.
|
|
|
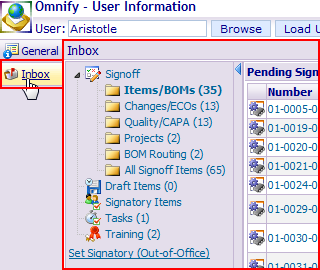
The Inbox displays a list of objects that the user is active for review and/or signoff, as well as any active tasks that the user has open.
Selecting the Inbox tab will display the User's Inbox.
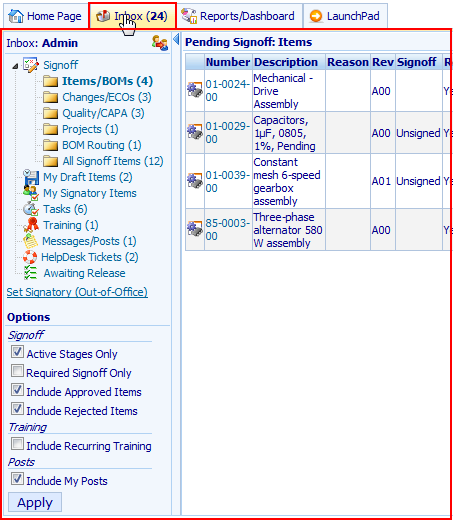
The tab will contain the total number of active objects for the user.

Clicking on a link in the Inbox tree will update/filter the list for the selected option.
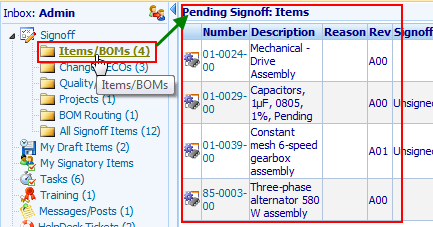
The Inbox tree contains the following options/filters:
| Items/BOMs |
Lists the pending part requests for which the user is currently active on the signoff |
| Changes/ECOs |
Lists the pending Changes for which the user is currently active on the signoff |
| Quality/CAPA |
Lists the pending Corrective/Preventive Actions for which the user is currently active on the signoff |
| Projects |
Lists the pending Projects for which the user is currently active on the signoff |
| BOM Routing |
Lists the BOM routing items for which the user is currently active on the signoff |
| All Signoff Items |
Lists all objects for which the user is currently active on the signoff |
| My Draft Items |
Lists all "draft" objects that the user created and has not started the signoff routing |
| My Signatory Items |
Lists all active signoff objects that the user is a signatory user on |
| Tasks |
Lists all open tasks for the user |
| Training |
Lists all training items that the user has not completed |
| Messages/Posts |
Lists all personal HelpDesk posts that the user has not read |
| HelpDesk Tickets |
Lists all active tickets where the user is the Owner |
| Awaiting Release |
Lists all objects that are awaiting release |
The Options section contains the following Inbox options:
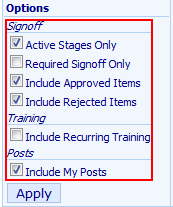
|
| Active Stages Only |
If this option is enabled (checked), the Inbox will list items where you are on the active signoff stage. If this option is disabled (unchecked), the Inbox will list all items where you are on the signoff list even if you are not on the active signoff stage. |
| Required Signoff Only |
If this option is enabled (checked), the Inbox will list only items where you are required for signoff. If this option is disabled (unchecked), the Inbox will list items where you are required or a reviewer. |
| Include Approved Items |
If this option is enabled (checked), the Inbox will include items that you have already approved. If this option is disabled (unchecked), the Inbox will include items that you have not approved yet. |
| Include Rejected Items |
If this option is enabled (checked), the Inbox will include items that you have already rejected. If this option is disabled (unchecked), the Inbox will include items that you have not rejected. |
| Include Recurring Training |
If this option is enabled (checked), the Inbox will include recurring training items. If this option is disabled (unchecked), the Inbox will not include recurring training items. |
| Include My Posts |
If this option is enabled (checked), the Inbox will list open HelpDesk posts that you have authored. |
Clicking on a link in the Inbox tree will update/filter the list for the selected option.

The list will include all critical information as well as a hyperlink to open the object.

You can sort any of the columns by clicking the column header.

You can customize the fields in the Inbox from the User Preferences form.

The Home Page section allows you to set custom Inbox fields.


Desktop allows users to dynamically set an authorized Signatory for active signoff objects.
To view and set the authorized Signatory, select the Set Signatory (Out-of-Office) Inbox option.
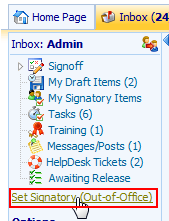
The list will display all active signoff objects as well as a checkbox column.
The Assign/Clear Signatory dialog box will appear at the bottom of the list.
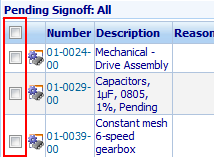
To set a Signatory, check the items you wish to assign and then specify a Signatory user.
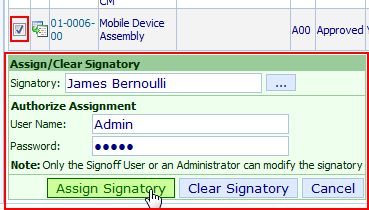
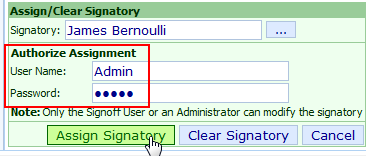
To assign a signatory, you must specify your user name and password.
Note: you can also specify an administrator user name and password.
The Signatory can be set either temporarily or permanently.
Users who will not be able to sign off on items for an extended period of time may want to set the Signatory while they are away and then clear the Signatory upon their return.
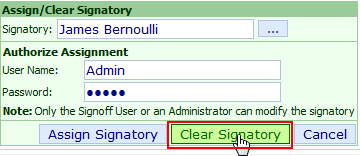
To clear the Signatory, again select the desired objects, specify the user name and password, and then click the Clear Signatory button.
To view another user's Inbox, click the Other User icon in the Inbox.

This will launch the User Quick Search form.

From the Quick Search form, you can type in partial or full user names and click the Search/Open button.
If an exact match is not found, the system will list possible matches.
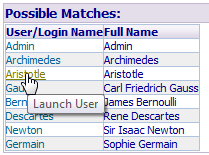
Clicking on the user, will open the User form.
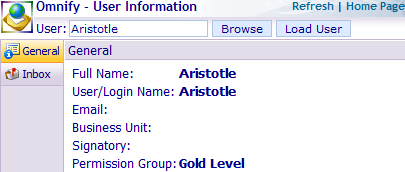
To view the user's Inbox select the Inbox tab.
|
 |
Reports/Dashboard |
Top |
|
The Reports/Dashboard tab allows you to display custom LiveData/Report objects.
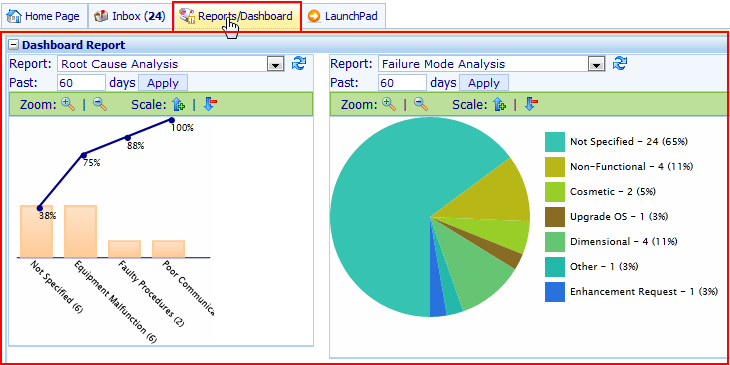
Omnify LiveData Objects are Web Services that return formatted HTML data that can be displayed on the Omnify Desktop and Reporter Home Pages.
LiveData Objects are created as web services, and then enabled for users to decide which objects they would like to enable on their Home Page.
LiveData objects are created in the Omnify Reporter.
You can select the LiveData objects to be displayed on your Reports/Dashboard tab from the User Preferences form.

To add/remove reports from the Reports/Dashboard tab select the LiveData Reports option.
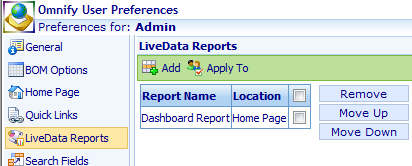
To add a report, click the Add button.
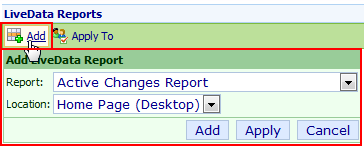
From the Add LiveData Report dialog box, you can select the desired LiveData report and then specify the location (Desktop or Reporter).

To add the report, click the Add or Apply button.

To remove or change the order, check the desired item and then use the Move Up, Move Down, or Remove buttons.

|
|
|
The LaunchPad tab provides users with a simple user interface to quickly access Omnify objects.
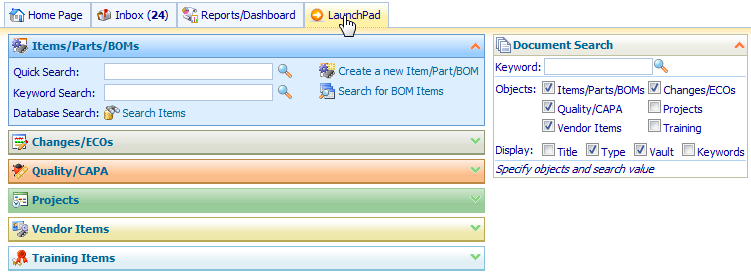
The LaunchPad tab contains areas for the commonly accessed Omnify objects.
Clicking the header of one of the object boxes will expand that object and minimize all others.
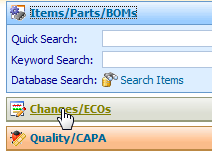
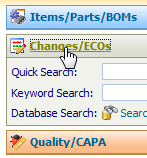
Each section provides quick access to the Quick, Keyword, and full Search forms.

Each section also provides links to create new objects.

The LaunchPad also provides a document searching feature.
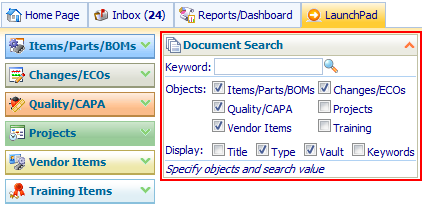
The Document search form allows you to specify keywords and objects that you wish to find.
The system will search all documents associated with items for matching keywords.
The system will display all matching results along with hyperlinks to view the document or the associated object.
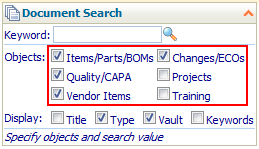
To perform a document search, first check the objects you wish to search on.
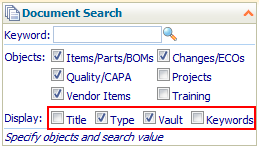
You can choose which fields will be displayed using the Display checkboxes.
To perform the search, specify a keyword to search on and then click the Run Search icon.

The system will search all key document fields as well as the object fields:
| • |
File URL/Name |
| • |
File Title |
| • |
File Type |
| • |
File Keywords |
| • |
Vault Name |
| • |
Numbers/Part Numbers |
| • |
Descriptions |
| • |
Reason field (Changes/ECOs and Quality/CAPA) |
Refer to the Document Management section for more information on document properties.
The results will be displayed below the search form.
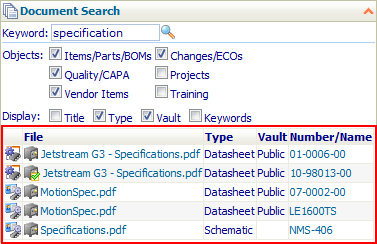
Icons will indicate the object type.
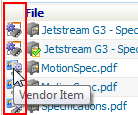
You can view the document by clicking the hyperlink on the document name.

You can open the associated object by clicking the hyperlink on the number field.

|
|