| Overview |
Omnify Desktop includes a compare form that allows you to compare 2 or more revisions of the same or different items.
When comparing items you can display BOM and attribute differences.
The Compare form contains the following areas:

| Compare Items/Revs |
Specify the items and revisions to be compared |
| View/Compare Field Options |
Select which fields will be displayed and compared |
| View Settings |
Specify results view data set |
| Compare Results |
Differences in data sets |
|
 |
Launching the Compare Form |
Top |
|
You can open the Compare form from the New Object wizard or main toolbar.
You can launch the New Object Wizard from the Common Links section of the Object Viewer.
Clicking the link will launch the New Object Wizard.

From the New Object wizard, click the New Compare Form option.

You will be redirected to a blank Compare form.

You can also launch the Compare form from the View drop list on the Parts List page of the Item form.

Note: When launching from the Part List page, the system will automatically add the BOM item as a compare item.
If more than one revision is available, the system will include the current and previous version in the comparison automatically.

|
 |
Specifying Compare Items |
Top |
|
To add compare items click the Add Item button.
This will display the Add Item dialog box.
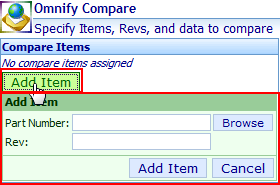
From the Add Item dialog box you can either type the part number or click the Browse button.

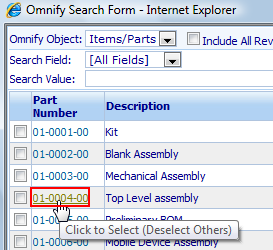
This will invoke the Object Search form. From this form you can search for the desired item.
Once the item is found, click the hyperlink to set the Part Number field.
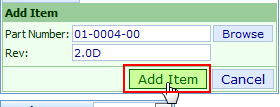
Click the Add Item button to add as a compare item.

You will need 2 or more items in the Compare Items list to execute the compare.
Repeat the steps above to add more Compare Items.
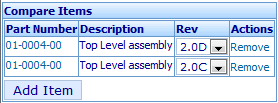
Each Compare Item will display a Rev drop list that will allow you to set the Revision for each item.
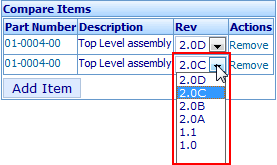
You can specify an unlimited number of compare items.
|
 |
Comparing Data |
Top |
|
Once two or more items have been specified, the system will run the compare automatically.
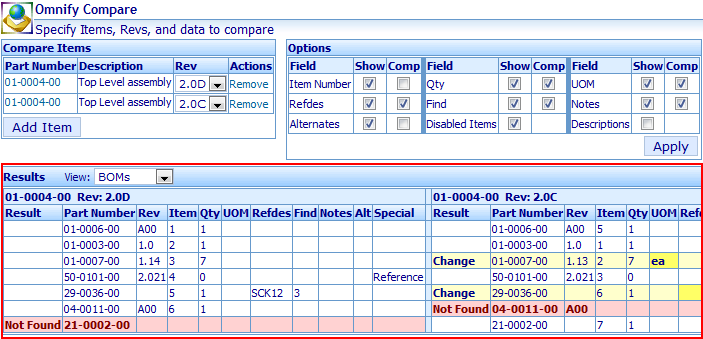
Changing revisions, adding items, and removing items will also run the compare automatically.

Clicking the Apply button from the Options section will always rerun the comparison.

|
 |
Analyzing Results |
Top |
|
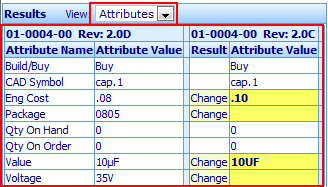
After the comparison is executed, the results lists will display the differences.

The results list will display all compare items horizontally.

The data set for each compare item will appear vertically under each change item.
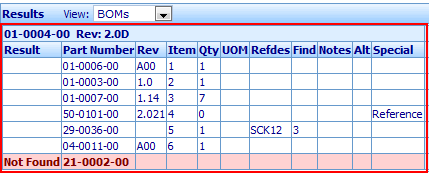
Differences in the data will be displayed in different colors and font styles.

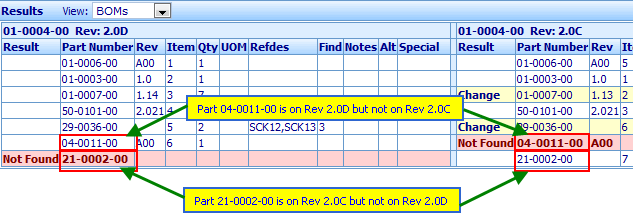
|
 |
Compare Views |
Top |
|
You can select the data filter by selecting either BOMs or Attributes option from the View list.

|
 |
Compare Options |
Top |
|
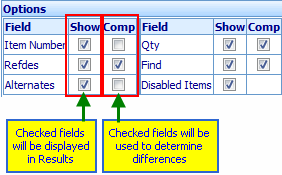
The Options section allows you to select which BOM columns will be displayed and which columns will be used to determine differences.
Each field contains a checkbox for Show (display the field) and Comp (include as a comparison field).
|