| Overview |
The Object Viewer is a customizable area of the Desktop Home Page that provides you with quick access to database forms and objects.

You can show and hide the Object Viewer using the Show/Hide icons on the page splitter bar.
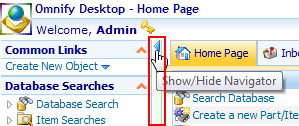
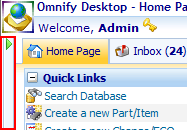
You can set the Object Viewer to default to hidden from the User Preferences form.

To hide the Object Viewer by default, check the Minimize Navigator option in the Home Page section.

|
|
|
The Object Viewer contains 4 main sections:

| Common Links |
Contains links to the New Object Wizard |
| Database Searches |
Quick way to launch the various database search forms |
| Reports |
Links for the Omnify Reports and various standard and custom reports |
| My Links |
Customizable list of user specific hyperlinks |
You can condense/expand each section by clicking on the section header bar.
|
 |
Common Links |
Top |
|
The Common Links section contains a link to the New Object Wizard.
Clicking the link will launch the New Object Wizard.

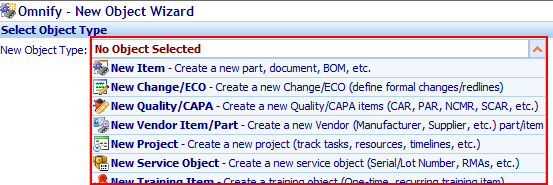
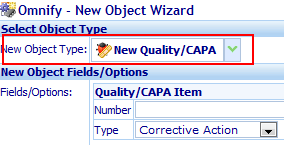
The New Object Wizard form will appear and the user will have to select the specific object from the drop list.
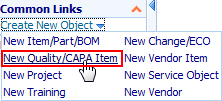
Placing the mouse over the hyperlink will present a popup menu that will allow you to select a specific type of object to create.
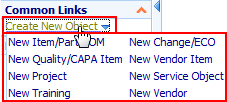
Selecting a specific object will launch the New Object Wizard form and automatically selects the object.
|
 |
Database Searches |
Top |
|
The Database Searches section contains links for searching on all object types.
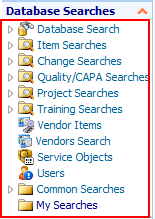
You can expand and condense any of the tree limbs by clicking the expand/condense icons.
The Database Search items provide you with links to launch the Standard Database Search form.
Expanding the Item Searches limb will expose the following links:
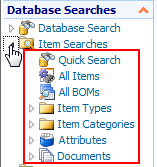
| Quick Search |
Launches the Item Quick Search form.
|
| All Items |
If enabled, launches the Standard Database Search form and lists all items in the database.
Note: search results may be limited to specified Max Record count.
|
| All BOMs |
If enabled, launches the Standard Database Search form and lists all BOMs in the database.
Note: search results may be limited to specified Max Record count.
|
| Item Types |
Expanding the Item Types limb will list all item types in the database.

Selecting an item type launches the Standard Database Search form and lists all items of that type.
If enabled, each item type can be expanded to display the categories that are assigned to the type.

Selecting one of the categories launches the Standard Database Search form and lists all items of that type and category.
|
| Item Categories |
Expanding the Item Categories limb will list all item categories in the database.
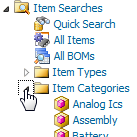
Selecting an item category launches the Standard Database Search form and lists all items of that category.
|
| Attributes |
Expanding the Attributes limb will list all item attributes in the database.
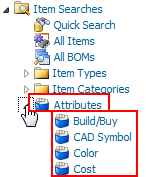
Selecting an item attribute launches the Standard Database Search form and automatically selects the attribute field as a search field.
Note: the search will not be executed, and you will be able to provide a value for the attribute before running the search.
|
| Documents |
Expanding the Documents limb will list all document types in the database.

Selecting a document type launches the Standard Database Search form and lists all items that contain a document of the selected type.
|
You can include/exclude item types, categories, and attribute fields from the Item Searches limbs from the User Preferences form.

The Home Page section allows you to choose which links should appear in the list.
The Navigator Options section allows you to show/hide specific fields.
The option enables categories to appear under their parent types.


The Change Searches, Quality/CAPA Searches, Project Searches, and Training Searches limbs follow the same approach as the Item Searches options above.
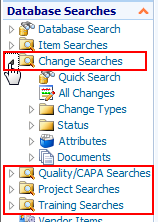
Selecting a specific link will launch the Standard Database Search form and search the database with the specified parameters.
Selecting the Vendor Items link will launch the Standard Database Search form and automatically select the Vendor Items object to search on.
Selecting the Vendors Search link will launch the Standard Database Search form and automatically select the Vendors object to search on.
Selecting the Service Objects link will launch the Standard Database Search form and automatically select the Service Objects to search on.
Selecting the Users link will launch the User Quick Search form.
The Common Searches and My Searches limbs will contain folders and links to stored user and common searches.

When using the Standard Database Search form, you will be able to save searches.
When the search is saved, the system will store the specified search parameters.
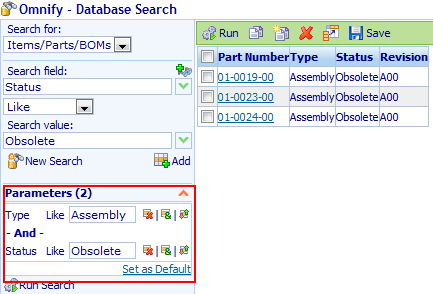
Clicking the Save toolbar button will display the Save Search dialog box.
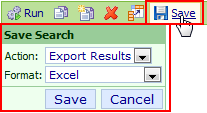
To save the search parameter, set the Action option to Save Search.

You will be able to specify the type as Personal or Public (if permissions allow).
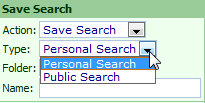
If folders exist for the selected type, you will be able to place the search link at the root or within the selected folder.

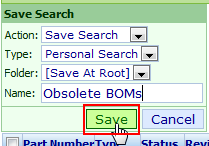
Once the type, location, and Name have been specified, click the Save button.
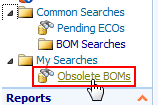
The Search link will now appear under the Common Searches and My Searches folders in the Object Viewer.
You can manage the folders and searches from the User Preferences form.

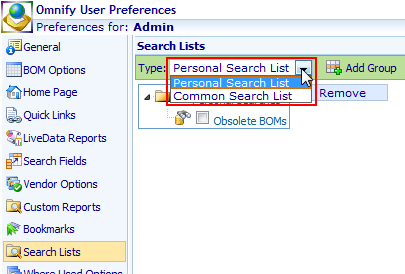
The Search Lists section allows you to manage both Personal and Common/Public (if permissions allow) folders and searches.
|
|
|
The Reports section of the Object Viewer provides links to all standard and custom Omnify Reporter reports.
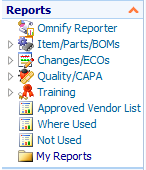
This list is also available from the Omnify Reporter Home Page.
For a complete listing and description of these links/reports, refer to the Omnify Reporter User's Guide.
|
|
|
The My Links section of the Object Viewer provides links the User Preferences form, on-line help files, and other Omnify applications.
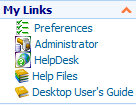
You can manage the links from the User Preferences form.

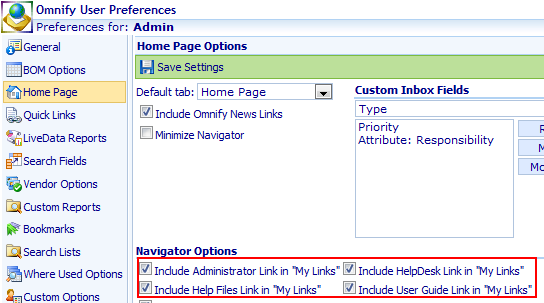
The Home Page section allows you to choose which links should appear in the list.
|