| Overview |
This section covers the following subjects:
|
 |
Web Browser Functions |
Top |
|
Omnify Desktop is a web-browser based application.
No client installation is required.
Supported browsers include: Microsoft Internet Explorer, Mozilla Firefox, Google Chrome, Safari
Many browsers provide built-in features that you can leverage to enhance the Desktop usability.
Clicking the right mouse button will invoke the browser's context menu.
The context menu will provide quick access to common browser functions such as navigating, sending, and exporting.
All printing is managed by your browser. To print any Omnify form, use the "File -> Print" command from your browser menus.
You can email other users the link and/or content of any Omnify form, using the "File -> Send" command from your browser menus.
On many forms in Omnify a large amount of data (items, lists, text, etc.) may be displayed.
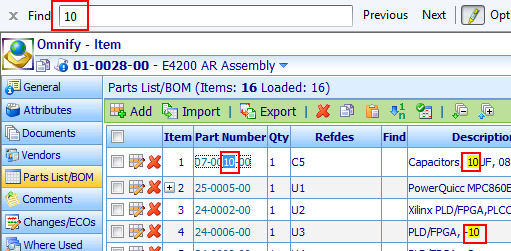
Using the web browser's "Find on Page" (usually Ctrl+F) to search for specific text on the forms may help you find key pieces of information.
This is usually available from the application menus or by clicking the Ctrl + F button.
The "Find" feature will allow you to specify text to find and then highlight the matching areas.
|
 |
Object Search Form |
Top |
|
For many operations in Desktop (e.g. Adding an item to a BOM/Change/Quality, selecting users, adding associations, etc.), the system will invoke the Object Search form.
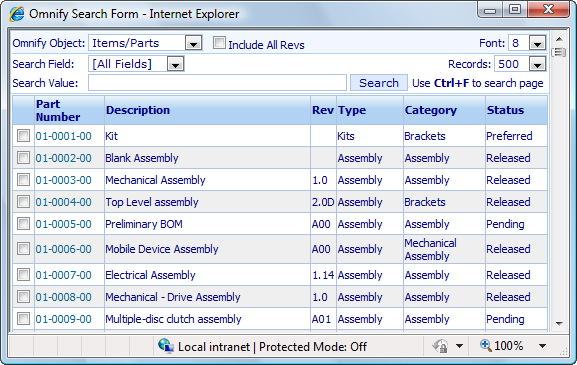
The Object Select form contains the following sections:
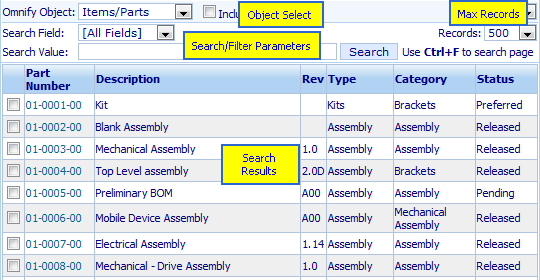
| Object Select |
Depending on the operation/function you are performing the Object drop list will display the appropriate objects |
| Search/Filter Parameters |
Allows you to search the database on specific fields to filter the results |
| Max Records |
Allows you to select how many records will be displayed in the results list |
| Search Results |
Display all matching objects based on the search criteria |
Depending on the operation/function you are performing the Object drop list will display the appropriate objects.

Once the Object is selected, the search results list will update to display all matching candidates.
Depending on the object selected the Search Field drop list will display the searchable fields.
You will be able to select a specific field or the [All Fields] option.
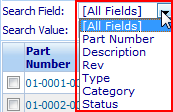
Once a field option is selected, you can then provide a value to search and then click the Search button.

The Search results list will update to display the matching candidates.

Depending on the operation you will be able to select one or multiple items.
To select a single item, click the Number hyperlink.
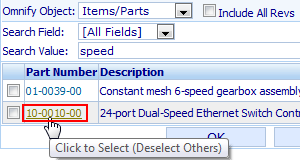
Note: the form will close automatically.
To select multiple items, check the object checkbox and then click the OK button.
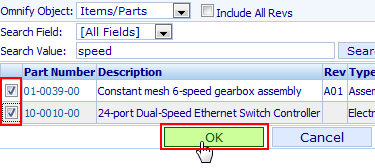
|