| Overview |
Service Objects provide a way for you to manage service related data that can be traced to a revision of the item.
Examples of service objects include: Serial/Lot Numbers, P.O. Numbers, Customer Names, Shipping dates, Locations, Test/Manufacturing Equipment, etc.
Service Objects can be associated with items or other service objects.
Service Objects can be affected items on Quality (CAPA) forms.
|
|
|
You can associate service objects to other service objects, thus allowing you to build hierarchical relationships.
For example, you can have a Lot Number that contains various Serial Numbers. You could create service objects for the lot and serial numbers and then assign the serial number objects to the lot object.

|
 |
Creating Service Objects |
Top |
|
All Service Objects are created using the New Object Wizard.

From the New Object wizard, select the Service Object option.

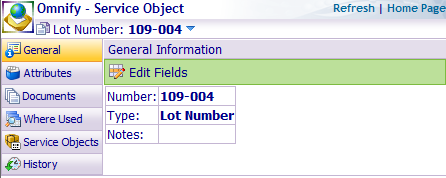
You will then be able to define the Service Object number, Type, and Notes as well as any additional default and/or required fields (defined in the Administrator).
Once all required fields have been supplied, click the Create button to create the Service Object.

You will be asked to verify the Service Object creation. Click the Create Object button to create the Service Object and launch the Service Object form.

|
 |
Searching Service Objects |
Top |
|
To find Service Objects, you can use any of the search functions covered in the Searching section.
Refer to the Searching section for more information on using database search techniques.
|
 |
Service Object Page |
Top |
|
The Service Object Page is available on the Item and Service Object forms.
The Service Objects page is where you associate service objects to items or other service objects.

The Service Objects Page contains the following sections:
- Toolbar - Quick access to common Service Object functions
- Service Objects List - Current listing of service objects
You can open a service object from the Service Object page by selecting the hyperlink in the Label field.

This will open the Service Object in a separate form.

|
 |
Adding/Assigning Service Objects |
Top |
|
From the Service Objects page, to add a service object, click the Add Item button.

This will invoke the Object Search form which will allow you to search/find the desired Service Objects.
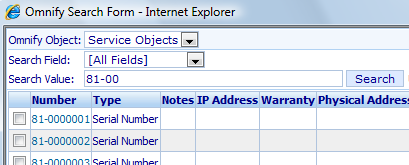
You can add Service Objects by checking the item checkbox and then clicking the OK button.

|
 |
Editing List Items |
Top |
|
To modify any service object on the Service Objects page, click the Number hyperlink.

This will open the Service Object in a separate form.

To remove a Service Object, click the Delete hyperlink from the Actions column.

You will be asked to verify the removal.

|
 |
Service Object Form |
Top |
|
Launching any service object will display the Service Object form.


The Service Object form contains the following tabs/pages:
|
 |
Service Object Form - General Page |
Top |
|
The General page of the Service Object form allows you to modify the following fields:
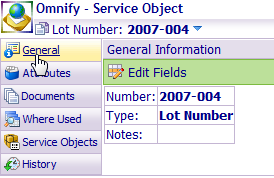
| Number |
Service object number/label |
| Type |
Service Object type (user-defined options) |
| Notes |
Additional notes/comments |
To modify any of the general fields, click the Edit Fields toolbar button.

This will place the fields in an edit mode and allow the user to set field values.
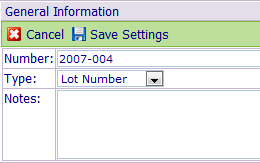
To cancel the editing mode, click the Cancel toolbar button.

To apply any field value changes, click the Save Settings toolbar button.

|
 |
Service Object Form - Attributes Page |
Top |
|
The Attributes page of the Service Object form allows you to define/set the user defined attributes.
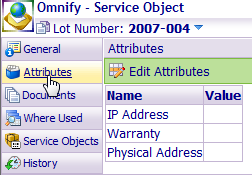
Attribute fields can be defined as "User Edit" or "Pick List" values.
Attribute fields and value types are defined in the Omnify Administrator.
To modify any of the attributes, click the Edit Attributes toolbar button.

This will place the fields in an edit mode and allow the user to set field values.
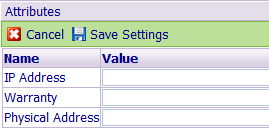
To cancel the editing mode, click the Cancel toolbar button.

To apply any field value changes, click the Save Settings toolbar button.

|
 |
Service Object Form - Documents Page |
Top |
|
Omnify supports unlimited document/attachment assignments for any service object.
Documents are specified by their path and file name, and can optionally contain a Title and Type to help describe the document.
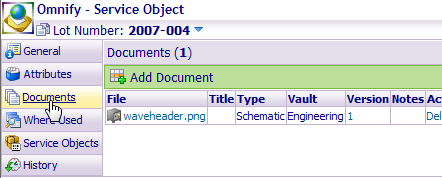
Documents associated with service objects in the Omnify database can be either vaulted or non-vaulted documents.
- Vaulted Documents - Document information is managed in and by the Omnify database.
Vaulted documents require "Check-out" and "Check-in" functions to make modifications to the document.
- Non-vaulted Documents - Document items are links to existing files (typically in a shared file area/directory)
The Documents Page contains the following sections:
| Toolbar |
Quick access to common Document functions |
| Document List |
Current listing of associated documents |
| Document Navigator |
Quick filter for displaying specific documents in the document list |

Refer to the Document Management section for more information on managing documents.
|
 |
Service Object Form - Where Used Page |
Top |
|
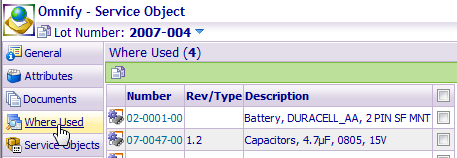
The Where Used page displays a list of items and service objects that are associated with the currently open service object.
|
 |
Service Object Form - History Page |
Top |
|
The History Page lists all change, viewing, and email history (audit trail) for every item.

Any change that occurs (interactive changes, data uploads, ECO changes, etc.) is recorded for every item in the database.
Desktop will automatically fill in the change and viewing history information for this page.
The History list will display all changes to the item as well as the viewing (who has opened the item) and email history.
To change the view, select the Viewing History, Change History or Email History option from the Display drop list.

The Change History list contains the following information:
- Change - Type of Change (Attributes, BOM, Vendor Items, Documents, etc.)
- Details - Actual data changes
- User - User who made the change (or released the ECO)
- Date/Time - When the change was made
- Tool Used - Omnify module used to make the change (i.e. Desktop, ECO Processor, etc.)
The Viewing History list contains the following information:
- User - User who opened the item
- Date - When the item was viewed
- Tool Used - Tool/module used to view the item
- Workstation - Machine/system used to view the item
The Email History list contains the following information:
- Send Date/Time - Date and time the email was sent
- Subject - Subject line of the email
- User - User who sent the email
- Type - Either interactive or automatic
The Email list will contain a Details icon.
Clicking the icon will display the content of the email.


|