| Overview |
Affected items on a Change/ECO represent the items whose data will be changed by the changes defined on the Item Changes page.
Affected items list can contain:
- Items (Parts/BOMs/etc.)
- Vendor Items
There is no limit to the number of Affected Items you can have on a Change/ECO.
|
 |
Affected Items Page |
Top |
|
The Affected Items Page contains the following sections:

| Toolbar |
Quick access to common Affected Items functions |
| Affected Items List |
Current listing of Affected Items |
The Affected Items Toolbar contains the following commands:
 |
Add an Affected item |
 |
Edit properties (Status, Effective, Notes, Dispositions) of all items (Group Edit) |
 |
Copy checked items |
 |
Paste session buffer items as affected items |
 |
Remove checked items |
 |
Run the Pending Items check on all affected items |
 |
Open Affected Item report |
 |
Run the document packager |
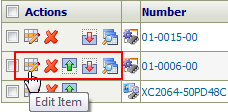
Each Affected Item contains action hyperlinks (Action column):
 |
Edit item properties |
 |
Remove item |
 |
Move item up on list |
 |
Move item down on list |
 |
Run the Affected Item Rollup on items |
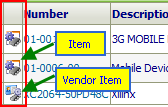
The Affected Items list will contain an object icon column that will display the object type.
|
 |
Opening Affected Items |
Top |
|
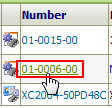
To open any items from the affected item list, click the Number hyperlink.
|
 |
Adding Affected Items |
Top |
|
There are many ways to add items to the affected items list:
- Interactively - Using the Add button from the Toolbar
- Copy & Paste - from the Database Search window or Item Banner
- Automatically - When automatically generating Changes/ECO (i.e. BOM Import, Replace Item [Where Used], Raise New [Changes/ECOs Page])
- Affected Item Rollup - When automatically or interactively running the Affected Item Rollup
You can add items interactively using the Add button from the toolbar.
Clicking the Add button will invoke the Object Search form.

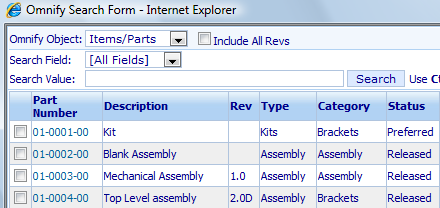
From the Object Search form you will be able to select either Items or Vendor Items.

You can search on any of the displayed fields by typing a search value and clicking the Search button.
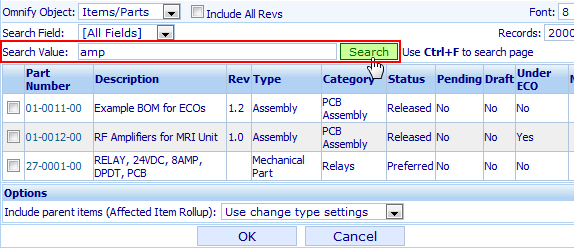
The Object Search form will contain columns that will display the internal state of the objects (Pending, Draft, Under Change/ECO).

Some Administrator rules may prevent items from being added based on their internal state or if they already appear on other pending Changes/ECO (Under ECO).
For those items, the Notes field will indicate the conflict and the item will not be allowed to be added to the Change/ECO.

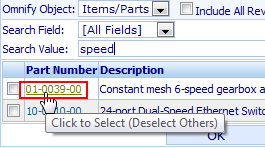
You can select one or more items to add. To add a single item, click the hyperlink.
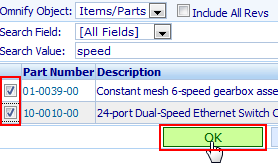
To select multiple items, check the checkboxes of the desired items and then click the OK button.
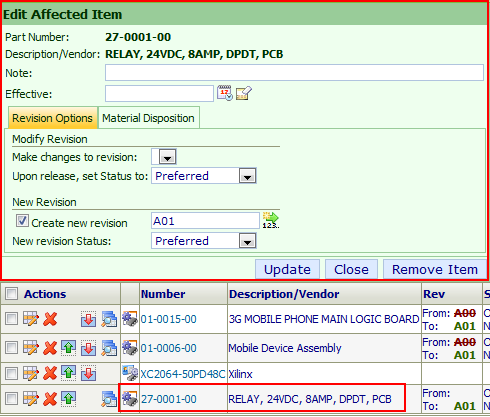
Note: when adding a single item, the system will add the item to the list and then automatically display the Edit Affected Item dialog box to allow you to set additional properties.
When adding items, you will also be able to control the Affected Item Rollup options.

| Use change type settings |
If this option is selected, the system will read the Administrator setting to determine if the rollup should run based on the Change Type |
| Do not include parent items |
If this option is selected, the system will not run the affected item rollup |
| Include parent items |
If this option is selected, the system will always run the affected item rollup |
You can copy the affected items from another Change form or Database Search using the Copy and Paste commands on the toolbar.
|
 |
Editing Affected Items |
Top |
|
To edit the properties of an affected item, click the Edit hyperlink in the Actions column.

This will invoke the Edit Affected Item dialog box.

Using the Edit Affected Item dialog box you will be able to define
Revision and Status changes as well as define Material Disposition fields.
The Edit Affected Item contains two tabs (Revision Options and Material Disposition) to simplify the display of fields.
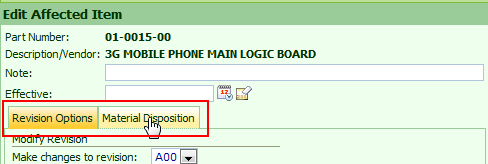
Refer to the following sections for information on modifying the affected item properties.
The Affected Items page provides you with a Group Edit function that allows you to set Status, Notes, Effective Dates, and Disposition fields for all (or specified affected items).
To invoke the Group Edit Dialog box, first check the affected items you wish to modify.

Then click the Edit toolbar icon.
This will display the Group Edit dialog box.

To set/modify a field, first, select the field from the Field drop list.
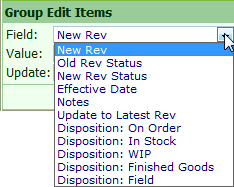
Once the field is selected, you can then specify the new field value in the Value list.

You can select whether you are updating the checked items or all items.
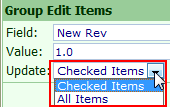
To modify the field for the specified (checked) items click either the Apply or Update button.

|
 |
Removing Affected Items |
Top |
|
To remove an affected item, click the Remove icon hyperlink in the Actions column.

You will be asked to verify the removal.

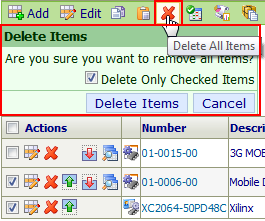
To remove multiple affected items, click the action checkbox for the desired items:

Then click the Remove icon from the Affected Items toolbar.
You will be asked to verify the removal.
|
 |
Revision Changes |
Top |
|
For each item on the affected item list, you must specify the revision of the
item that you wish to change by selecting it in the Modify Revision section.
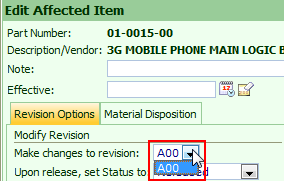
You can define whether or not the item will be "up-reved" by the Change/ECO by
checking/un-checking the Create new revision: option in the
Properties dialog box (Rev/Effective Options page).
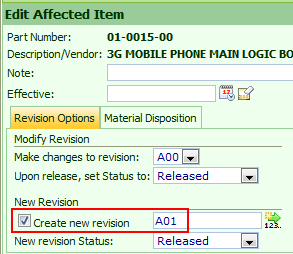
The Affected items list will display "strike-throughs" where Rev changes will occur.

|
 |
Status Changes |
Top |
|
For each affected item, you can define status changes for the modified and/or new revision.
Status changes for modified and new revisions are defined in the Affected Item Properties dialog box.
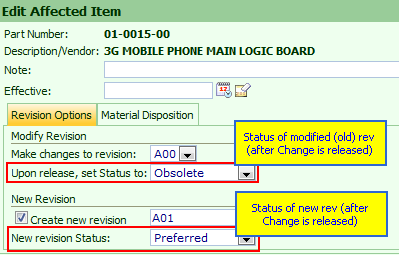
Revision status changes will be displayed in the Status field of the Affected Items list.

|
 |
Affected Item Rollup |
Top |
|
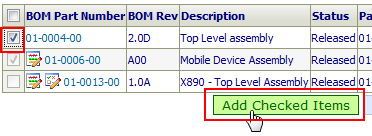
The Affected Item Rollup is a function that looks at all BOMs (and their Parent BOMs) that an affected item appears on and includes them on the affected item list.
The Affected Item Rollup can occur automatically (assigned in the Administrator) based on the Change Type.
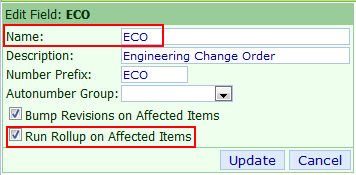
You can execute the Affected Item Rollup for any affected item interactively, by clicking the Rollup icon in the Actions column.


The Affected Item Rollup window will display all parent BOMs.
The List Status field will indicate those items that are already on the affected items list as well as those that cannot be added.

You can add items from the affected items list by checking the checkbox and then clicking the Add Checked Items button.
The Affected Item Rollup allows you to define rules that will be applied to
rollup items to have specific items be ignored when the Automatic Rollup runs.
These rules are defined in the Omnify Administrator.

These rules are automatically applied when the Affected Item rollup is executed automatically or interactively.
|
 |
Checking BOMs for Pending Items |
Top |
|
When releasing items under Change, the Change Processor will automatically check the item to determine if it:
- Contains a Bill of Material (BOM)
- If it contains a BOM, if any of the BOM items are pending
The system will not allow items to be released if it contains pending BOM item(s).
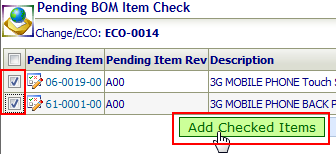
You can interactively run the child item check using the Check Pending BOM Items command from the toolbar.


When running interactively, if there are any pending child items, you will be
able to Add any pending items to the current Change.
|
 |
Affected Item Ordering |
Top |
|
By default, the affected items will be listed in alphabetic order (based on Part Number).
However, you can enable custom ordering for displaying items on the Affected Items list.
To modify the order of the affected items, use the Move Up and Move Down icons in the Actions column.
 |
Move item up on list |
 |
Move item down on list |
|