| Overview |
Desktop provides many ways to find items in the database:
| Object Quick Search |
Each Omnify object provides a Quick Search form that allows you to provide key information (Part Numbers, Descriptions, etc.) to quickly find and open objects |
| Keyword Search |
Allows searching of multiple fields (user-defined) for a user supplied keyword(s). |
| The Database Search Form |
Provides full parametric searching on multiple fields/values for Items, Changes, CAPA Objects, Projects, Vendors, and Service Objects |
| The Object Viewer |
Provides shortcuts for specific field value searches.
Refer to the Object Viewer section for more information. |
| LaunchPad |
Simplified user interface and search/launch area for objects. |
| Document Search |
Search for associated documents based on various fields and keywords. |
|
 |
Using Quick Search Forms |
Top |
|
Each Omnify object contains a Quick Search form that allows you to specify key field (such as: Part Number, Change/ECO Number, Project Name, Description, etc.) search parameters to find the desired objects.

You can launch the object Quick Search forms from various locations:
You can launch the Quick Search window from the Desktop area on the Omnify Server Home Page.

To launch the Quick Search, you must first select the object type you wish to search.

Next specify a search value for the key object fields and click the search icon.

The object Quick Search form will appear and the matching results will be displayed.

Note: if a unique match is found, the system will automatically open the object.
To launch the Quick Search forms from the Object Viewer, expand the desired Omnify object and click the Quick Search link.
Clicking the Quick Search link will open the Quick Search form for that object with no search values.

The LaunchPad tab provides users with a simple user interface to quickly access Omnify objects.
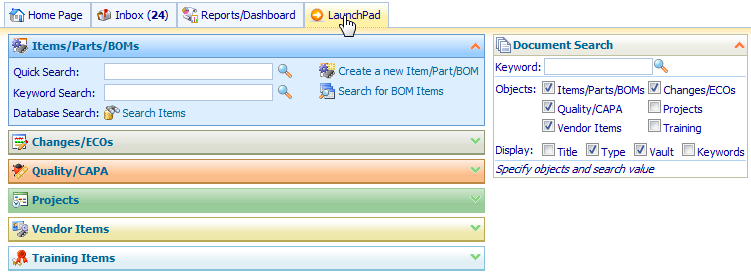
You can launch the Quick Search by selecting the desired object and specifying a search value.


Once the Quick Search form is activated, you can specify a search value in the search text box and then click the Search/Open button.

Note: the page banner will indicate the fields that will be used in the search.

The matching results will be displayed if multiple matches were found.
The results will contain a Match Field column that will indicate which field the match was found.

You can sort the results by clicking the column headers.

To launch the item, click the hyperlink.

If a unique match is found, the system will automatically open the object.
|
 |
Keyword Search |
Top |
|
Desktop provides you with a keyword search engine.
The keyword search will search multiple fields (user-defined) for a user supplied keyword(s).
The Keyword Search can be used to find:
| • | Items |
| • | Changes/ECOs |
| • | Projects |
| • | Vendors |
| • | CARs/PARs |
| • | Vendor Items |
| • | Service Objects |
| • | Training Items |
You can invoke the keyword search from various areas:
| • | Omnify Server Home Page |
| • | Desktop Home Page |
| • | LaunchPad |
| • | Database Search Form |
You can launch the Keyword Search from the Omnify Server Home Page in the Desktop area.
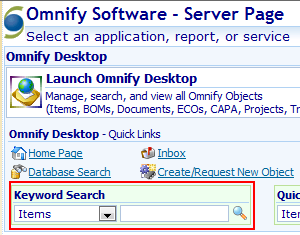
To launch, first select the object type.
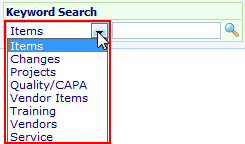
Then, specify a search value and click the search icon.
You can launch the Keyword Search from the Omnify Desktop Home Page in the Desktop banner (top right).

To launch, first select the object type.
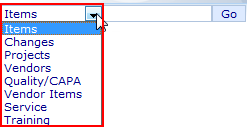
Then, specify a search value and click the Go button.
You can launch the Keyword Search from the LaunchPad tab of the Omnify Desktop.

To launch, first select the object type.

Then, specify a search value in the Keyword Search field and click the search icon.
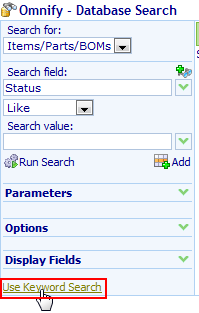
You can launch the Keyword Search from the Database Search Form by clicking the Use Keyword Search hyperlink.
The Keyword Search form contains the following sections:
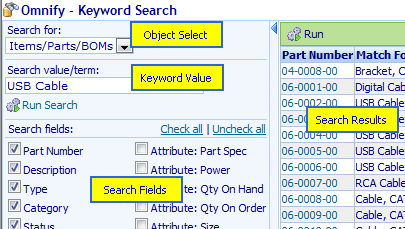
| Object Select |
Select the object you wish to find |
| Keyword Value |
Specify the keyword(s) to search on |
| Search Fields |
Select the fields to search |
| Results List |
Keyword search results |
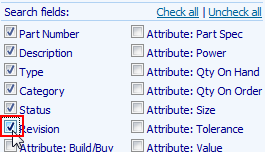
You can specify which fields to search by checking the desired fields in the Search Fields list.
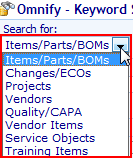
To execute a keyword search, first select the object type:
Next, specify the keyword(s)/search terms and click the Run Search button to execute the search.

The search results will display the number/name and matching field.

|
 |
Database Search Form |
Top |
|
The Database Search form allows full parametric searching for the following objects:
| • | Items |
| • | Changes/ECOs |
| • | Projects |
| • | Vendors |
| • | CARs/PARs |
| • | Vendor Items |
| • | Service Objects |
| • | Training Items |
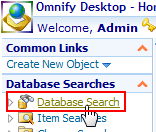
The search form can be invoked from the Object Viewer.
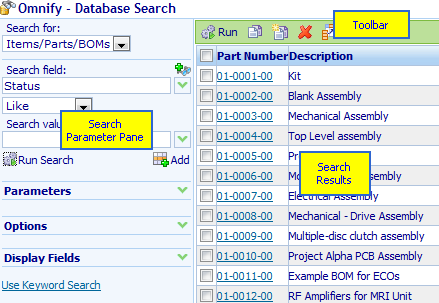
The Search Form contains the following sections:
|
 |
Search Parameters |
Top |
|
To run a search, you must provide search parameters.
You can specify an unlimited number of search parameters.
To perform a search, you must first select the object type from the Search for: drop list.
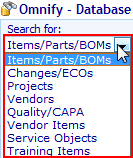
Once the Object is selected, you can then specify a search field by selecting the drop list button in the Search Field area.
This action will display a list of available search fields for the selected object.
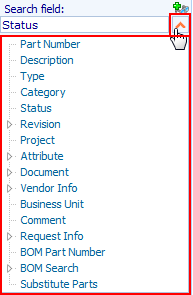
To select a field, click the field name hyperlink.

This will close the field list, and place the field in the Search field: box.

To set a field operator, select the desired operator from the Operator drop list.

To specify a search field value, you can type in the Search value: field.

You can also use the drop list button to select an available field value.

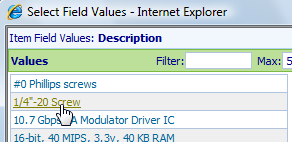
From the Select Field Value dialog box, clicking on any value will close the dialog and place the value in the Search value: field.


|
 |
Running Searches |
Top |
|
To run a search, click the Run Search button from the Search Parameters Pane.

Note: if multiple parameters are specified, the Run Search button will appear in the Parameters section.
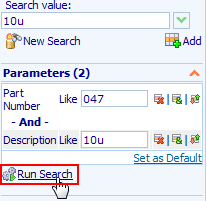
Refer to the Multiple Search Parameters section for more information on multiple search parameters.
You can also run a search using the Run button from the Search Toolbar.

|
 |
Multiple Search Parameters |
Top |
|
To specify multiple search parameters, you must first specify the search field, operator, and search value (as described above) and then click the Add button.
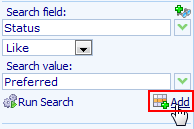
The search parameter will be added to the Parameters list.

You can show or hide this list using the Parameters header box.

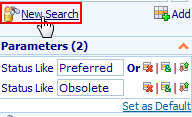
You can remove parameters from this list using the Remove button.

You can remove all parameters by clicking the New Search button.
|
 |
Parameter Groups |
Top |
|
The Search Form allows the user to customize the order/grouping of search parameters.
By default, when a search parameter is added, the search form will determine if the parameter is already included and automatically group the parameters together as an "Or" condition.
For example, a search already contains a search for "Status Like Preferred".

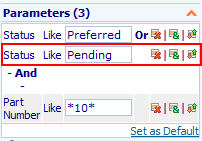
When the user adds another parameter that includes the Status field ("Status Like Pending"), the system automatically "groups" the 2 Status fields together as an "Or" condition.
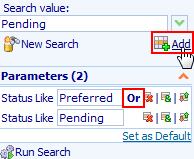
This results in a search for items with a status of "Preferred" or "Pending".
Different row colors are used to graphically display grouped parameters.
Adding parameters that include fields that are not in the parameters list will automatically result in creating a new group ("and" condition).

In this example the search would result in items that have a status of "Preferred" or "Pending", and contain "10" in the Part Number field.
You can split items into separate/new groups using the Separate Group button.
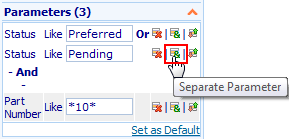
This will result in creating a new group/"and" condition.
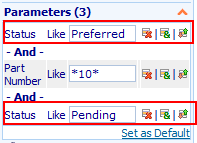
You can combine search parameters using the Move Parameter button.
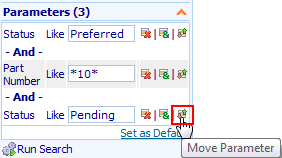
This will display the Move To drop list and allow the user to select a group to assign the parameter to.
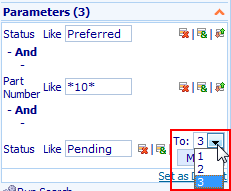
To move the parameter, select a group and then click the Move button.

|
 |
Default Parameters |
Top |
|
You can define default search parameters that the search form will automatically include when the user selects a search object.
To define default search fields, first add the desired search parameters using the methods described above.
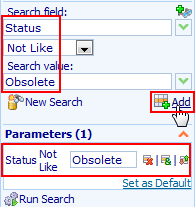
To set default search parameters, click the Set As Default hyperlink.
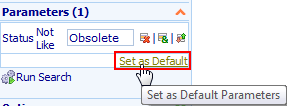
If you set default parameters, the next time the object is selected the default parameters will automatically be added to the parameters list.
To clear/remove default search parameters, remove all fields from the Parameters list.

Then, click the Set As Default hyperlink to clear any default fields.

|
 |
Search Terms |
Top |
|
The search form allows users to use "Search Terms".
Search terms are multiple words, delimited by a user-defined delimiting character, that will automatically result in creating an "or" condition for any field.
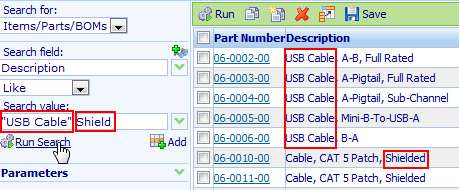
For example, if you wanted to search in the description field for items containing "USB" or "Cable", you could simply check the Use Search Terms option (Options section),
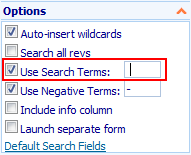
And then run a search on USB Cable in the description field.
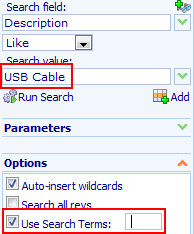
Note: the default delimiting character is a space character.
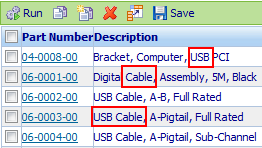
This would result in any items containing USB or Cable in the description field.
You can force the system to look for exact matches by enclosing the term with double quotes.
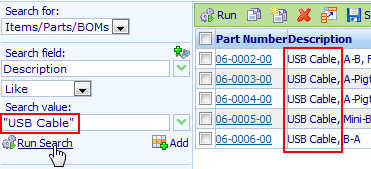
Exact terms can be combined with other search terms.
|
 |
Negative Terms |
Top |
|
When using Search Terms, you can also define "Negative terms".
"Negative Terms" are automatically converted to "not" conditions.
When using negative terms, you must define a prefix character that denotes the negative search terms in the Options section.
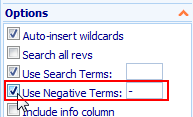
For example, if you wanted to search for all items that contained "USB" in the description but not "Cable",
you would search on "USB -Cable" in the description field.
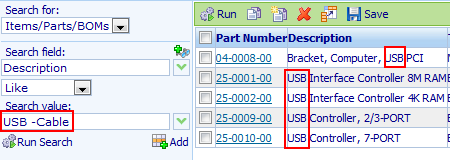
This would result in items that contained "USB" in the description field but not "Cable".
|
 |
Search Options |
Top |
|
The Options section provides the following search options:
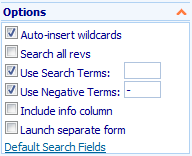
| Auto-insert wildcards |
If this option is enabled/checked, the search form will automatically include wildcards in your defined search. E.g. typing: "flash" in the search fields would be interpreted as: "*flash*" |
| Search all revs |
If this option is enabled/checked, the search form will include all item and training item revisions in the search results as opposed to just the active revisions |
| Use Search Terms |
If this option is enabled/checked, the search form will use Search Terms in the search parameters. |
| Use Negative Terms |
If this option is enabled/checked, the search form will use Negative Terms in the search parameters. |
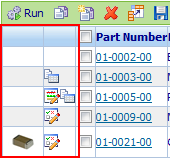
| Include info column |
If this option is enabled/checked, the search results list will include an info column to display object image, BOM, document, pending, and under ECO status icons.
|
| Launch separate form |
If this option is enabled/checked, the search form will use a separate browser window when opening objects. |
|
 |
Search Results |
Top |
|
The Search results list will display all matching items from your search.

The results list will include all default viewing and any "searched" fields.

From the results list you can open any object by clicking the hyperlink in the key field.

|
 |
Search Results - Sorting |
Top |
|
You can sort on any of the fields in search results list by clicking on the column heading.
| Sort column in Ascending order |
 |
| Sort column in Descending order |
 |
|
 |
Search Results - Selecting Items |
Top |
|
You can perform actions on any item in the Search Results list by first clicking the checkbox in the Actions column.

Once items have been checked, you can execute the actions (such as Copy) using the toolbar buttons.
You can select/deselect all items in the list by checking/unchecking the checkbox in the column header.
|
 |
Search Results - Copy and Paste |
Top |
|
Once items are selected/checked in the Search Results list, you can copy the data to an Omnify buffer using the Copy toolbar button.
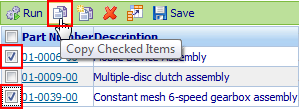
Once items have been placed in the Omnify buffer, you can paste the items to various other forms.
|
 |
Search Results - Saving a Search |
Top |
|
You can save the search parameters as a Public (available for all users) or Personal search.
Public and Personal searches will be available from the Object Viewer and when launched will automatically populate the parameters
list with the parameters specified when the search was saved.
Clicking the Save toolbar button will display the Save Search dialog box.

To save the search parameter, set the Action option to Save Search.

You will be able to specify the type as Personal or Public (if permissions allow).

If folders exist for the selected type, you will be able to place the search link at the root or within the selected folder.

Once the type, location, and Name has been specified, click the Save button.

The Search link will now appear under the Common Searches and My Searches folders in the Object Viewer.

You can manage the folders and searches from the User Preferences form.

The Search Lists section allows you to manage both Personal and Common/Public (if permissions allow) folders and searches.
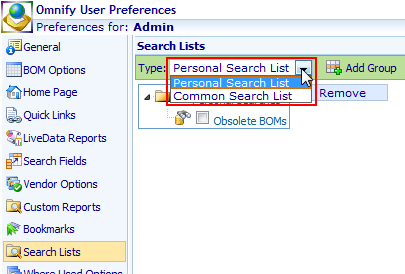
Saving searches will only save the search parameters and fields and not that data.
When the search is invoked again, the system will search all current objects for matching data.
To save the original data, use the Export option.
|
 |
Search Results - Exporting |
Top |
|
You can export the results from any Search Results list to the following formats:
- Excel - Microsoft Excel format
- HTML - HyperText Markup Language (Web Browser Format)
- Word - Microsoft Word format
- Text - CSV - Comma-Separated Value Files (Microsoft Excel Format)
- Text - Delimited - Pipe character (|) delimited text files
To export search results, click the Save button from the toolbar after you have executed a search.
This will invoke the Save Search dialog box.

From the Save Search dialog box, set the Action option to: Export Results.

Set the desired format from the Format list.
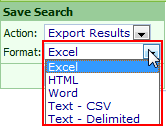
To export, click the Save button.

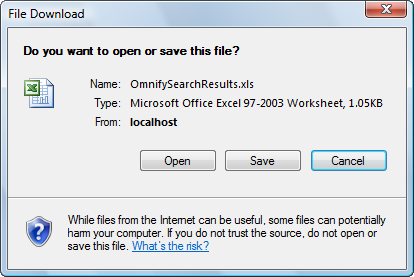
This will invoke your browsers download dialog box.
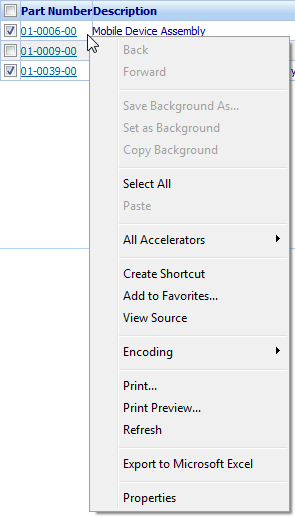
You can leverage your web browser's menus/context menu (right mouse click).
From these menus, you will be able to print, export, and perform various other web browser functions.
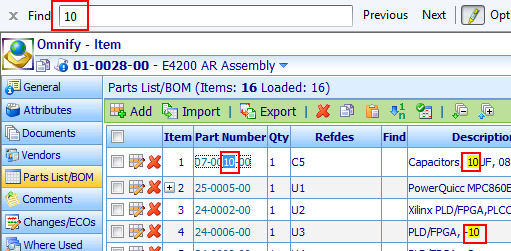
You can also leverage your web browser's "Find on Page" (usually Ctrl+F) to search for specific text on the forms.
|
 |
Search Results - Toolbar |
Top |
|
The Search Results list contains a toolbar to provide access to common search operations.

 |
Run/Rerun the search |
 |
Copy the checked item to the Omnify Buffer |
 |
Create new item similar to the checked (last checked) item (New Like) |
 |
Delete checked items |
 |
Set search field columns |
 |
Save/Export the search |
|
 |
Search Results - Info Column |
Top |
|
Enabling the Include info column option from the Options section will display additional columns in the search results.
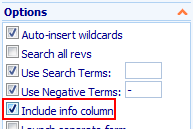

The Info columns will display any associated object images.

Another column will provide icons to indicate status.
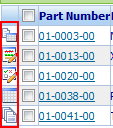
 |
Item contains BOM items |
 |
Item contains documents |
 |
Item contains both BOM items and documents |
 |
Item is currently under Change/ECO control |
 |
Item is currently pending/under signoff |
|
 |
Search Fields |
Top |
|
Users can customize which fields they will see from any of the search windows.
To select your own search results fields, select the Set Search Fields toolbar button.

This will invoke the Search Fields section of the User Preferences form.
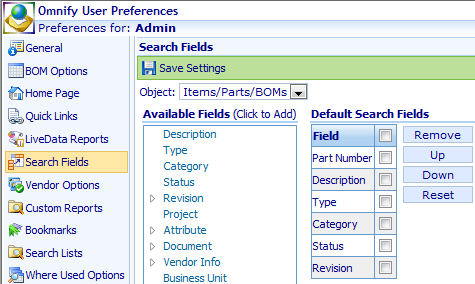
To set the desired output fields, first select the object type.
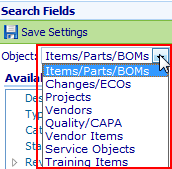
Once the object is selected, the Available Fields list will update to list all available fields for that object
and the Default Fields list will display the user's current settings.
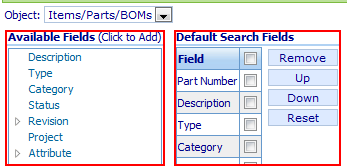
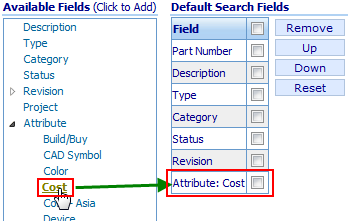
To add fields to the Default Fields list, click the field name hyperlink.
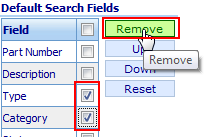
To remove fields from the search results list, check the fields you wish to remove and click the Remove button.
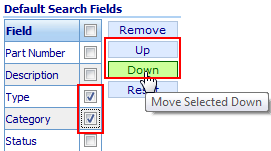
To change the order of the fields, check the fields you wish to move and use the Up and Down buttons.
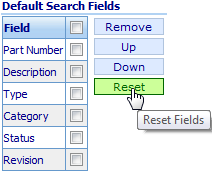
Clicking the Reset link will update the search results list to the default search fields.
Note: the number of output fields will have impact on the performance of the search.
You can dynamically add and remove fields from the search results.
The Display Fields section will list all fields included in the search results.
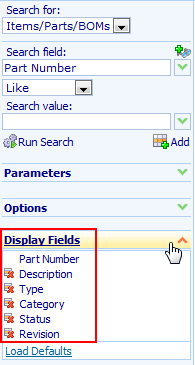
You can remove any of the view fields by clicking the remove icon.

You can add additional fields to the search results by selecting the field in the Search Field list and then clicking the Add as Display Field icon.

|
|
|
The LaunchPad tab of the Desktop Home Page provides users with a simple user interface to quickly access Omnify objects.

The LaunchPad tab contains areas for the commonly accessed Omnify objects.
Clicking the header of one of the object boxes will expand that object and minimize all others.


Each section provides quick access to the Quick, Keyword, and full Database Search forms.

|
 |
Document Search |
Top |
|
Desktop provides a document searching feature.
The Document Search form is available on the LaunchPad section of the Desktop Home Page.


The Document search form allows you to specify keywords and objects that you wish to find.
The system will search all documents associated with items for matching keywords.
The system will display all matching results along with hyperlinks to view the document or the associated object.
To perform a document search, first check the objects you wish to search on.

You can choose which fields will be displayed using the Display checkboxes.

To perform the search, specify a keyword to search on and then click the Run Search icon.

The system will search all key document fields as well as the object fields:
| • |
File URL/Name |
| • |
File Title |
| • |
File Type |
| • |
File Keywords |
| • |
Vault Name |
| • |
Numbers/Part Numbers |
| • |
Descriptions |
| • |
Reason field (Changes/ECOs and Quality/CAPA) |
Refer to the Document Management section for more information on document properties.
The results will be displayed below the search form.
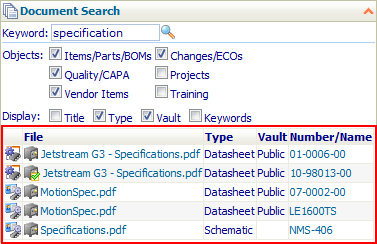
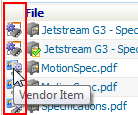
Icons will indicate the object type.
You can view the document by clicking the hyperlink on the document name.

You can open the associated object by clicking the hyperlink on the number field.

|