| Overview |
Associated Items can be used to identify a relationship between two or more Changes/ECOs or between Changes and Quality (CAPA) items.

The Associated Items page will display the Change/CAPA number and type.
The Number field will contain a hyperlink.

Clicking the hyperlink will open the object.
|
 |
Adding Associations |
Top |
|
To add an association, click the Add button.

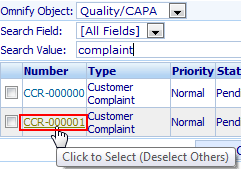
This will invoke the Object Search form.
From the form you will be able to select either Changes/ECOs or Quality/CAPA objects from the Object drop list.

You can use the search/find option to find the desired item.

Once you find the object(s), select the hyperlink to add the association.

The association will be added to the list.

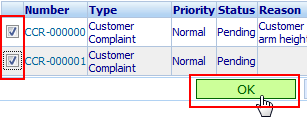
To add multiple items, check the item's checkbox and then click the OK button.

|
 |
Removing Associations |
Top |
|
To remove an association, click the Delete hyperlink on the Associated Items page (Actions column).

You will be asked to verify the removal.

|